Newbie Camper Conversion

Hi Ollie: it is a SWB crash test pop up roof with scenic canvas and integrated bed - sorry I don’t know what a Westdubs pop top is. My van is getting delivered next Friday I will ask then. Thanks
When the weather is good, you will love the Scenic canvas. Think of sitting up there enjoying a sunset with a glass of wine....!
We have a California and don’t have bellows like that
 
So, after playing with three heat pads on an aluminium plate and seeing 50C, I reduced to two and added the other to the side of the battery. Tested and provide results in the Electrics thread.

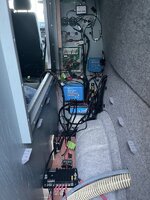
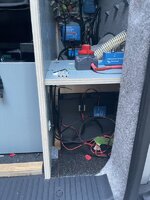
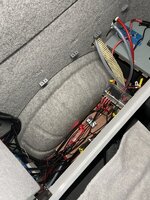
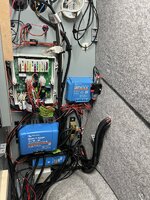
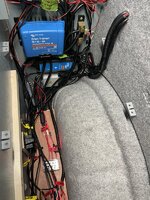
Now I’ve removed all the wiring and started making up my own cabling and connectors, matching cable length and current draw with correct AWG cable.
Again, kind of making this up as I go along. I know in my head what to do and just work methodically through it.

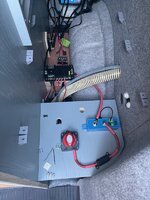
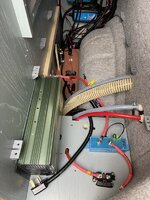
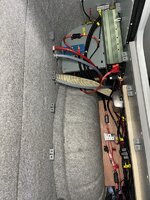
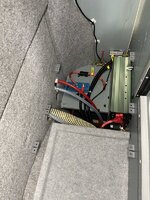
I’ve utilised some old ply to make bases, added an isolator switch and fuse too. Then run this off to a distribution box for minor break outs and the Planar diesel heater.
Then I have a separate run back directly to the battery for all things going back into the battery, (MPPT, DC-DC and AC-DC).
Negative to the south of the shunt and everything else to earth.

I need to think about the shower connections and possibility of leaks right above the battery.
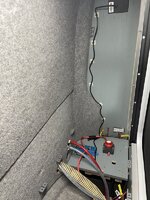
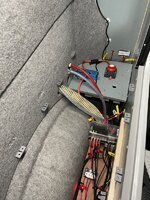
Securing the whole thing in.
Adding the Renology display - allowing me to shut the battery down
Location for the solenoid to switch the battery heater on, and associated switch
Then it’ll be onto the wiring and connection for the water heater. I’m going to utilise a solenoid as it’s switching 25Amps!

50FF91DB-B255-4330-92A2-E0CC91CB1354.jpeg458CEB9E-8D7C-4551-8B68-294B5A4B6744.jpeg9A1248A3-FC29-4206-A69B-31DAFF700DB8.jpeg
 
So, after playing with three heat pads on an aluminium plate and seeing 50C, I reduced to two and added the other to the side of the battery. Tested and provide results in the Electrics thread.

Now I’ve removed all the wiring and started making up my own cabling and connectors, matching cable length and current draw with correct AWG cable.
Again, kind of making this up as I go along. I know in my head what to do and just work methodically through it.

I’ve utilised some old ply to make bases, added an isolator switch and fuse too. Then run this off to a distribution box for minor break outs and the Planar diesel heater.
Then I have a separate run back directly to the battery for all things going back into the battery, (MPPT, DC-DC and AC-DC).
Negative to the south of the shunt and everything else to earth.

I need to think about the shower connections and possibility of leaks right above the battery.
Securing the whole thing in.
Adding the Renology display - allowing me to shut the battery down
Location for the solenoid to switch the battery heater on, and associated switch
Then it’ll be onto the wiring and connection for the water heater. I’m going to utilise a solenoid as it’s switching 25Amps!

View attachment 101526View attachment 101527View attachment 101528
Slow and steady is the way to go!
 
I have checked the window, it is in the correct orientation - thankfully!
The safety certification notice on the inside confirms this. It must be that this particular supplier has the slider towards the rear of the van.
Also, it's impossible to fit upside-down as the edge profile is different front to rear.
we fitted ours with opener at rear as when at motorway speeds the rear passengers prefer them, as on old T5 they had a face full when other way round and when on continent they need all the fresh air they can get in the back....
 
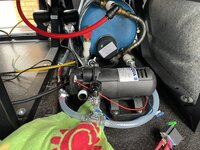
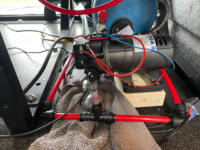
After fitting all the electrics I realised I needed to remove everything to run the longer water pipes.
so - removed all the cables and re routed the hot and cold water feeds from the hot tank and under slung water tank.
Put everything back in place and tested.
A0876DDF-1EE2-48BF-BEDA-B45116E60DE5.jpegEDC208E9-75F1-41C3-BF2B-D5D186105277.jpegF12991B6-39BF-42C8-A82E-17B781707C19.jpegEC0067AA-EB48-4703-AB9B-6BC557873041.jpeg62A1DFB4-D9BE-44FF-B9CF-C87100C80AEC.jpeg39D2ACE9-22A1-45A5-AB5D-330566025B52.jpegF58D7AF2-8D0C-4D3F-96B1-591A289199AB.jpeg89F33916-87A6-40FB-B59E-EB35B52B344A.jpeg

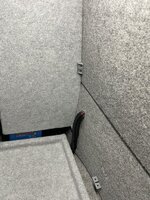
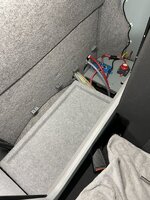
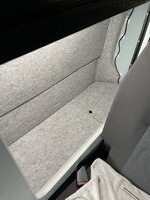
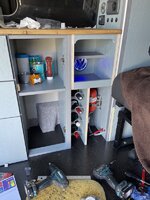
I made a new cover for the electrics - making it slightly longer to cover everything.
I lowered the original shelf height to make more use of available space.
I also added a small tray to hide away some minor valuables.

The only think that's not working is the Solar - it's not providing any power to the battery, I'll need to look at this next weekend.

Took her for a drive, first in months and pleased to see the DC-DC delivering 145W after I had gently warmed the battery to 8C.

Everything that draws power is now measured by the BVM-712.
Having the Renology BMS controller allows me to double check everything as it can't lie.

When I powered up the Aqua 8 Water pump it immediately blew the fuse. It's 3.5A and had a 10A fuse. Regardless, it was dead which I confirmed by ordering a replacement and switching out. The new one works fine with a 5A fuse now fitted. The last one barely used and not even lasting 5 months!!!!!

Next I need to get the water tank back on and check the water heater works correctly with the thermostats now wired up.

Then find somewhere to add an Inverter. Wasn't on the original list but investing in two e-gravel bikes which should arrive in time for summer.
 
Last edited:
UPDATE

So, with e-bikes arriving in the next few weeks I will need a method of charging them.
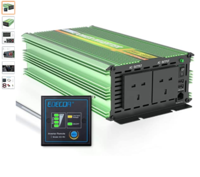
I looked at DC-DC converters and other ideas, but the simplest and easiest method was an inverter. This would also mean I could power a Pixie Nespresso machine with my purchased 1500W inverter.
I initially went down the Victron route, however they stop at 1200W so after some reading of various reviews went with the EDECOA Pure Sine Wave Power Inverter 1500W;
Screenshot 2021-03-08 at 12.36.13.png

It has a remote connect via RJ45 cable than turns the unit on and off, thus saving the 4W power drain when not in use.

It also has two sockets, meaning I can route one to the rear for the bikes and the other into the kitchen.

Once again this meant disconnecting the wiring and re-designing. I think I'm on Rev 4 now.
I wanted to remove the redundant main battery switch now I have the Victron smart battery and Renology interface unit.
This would allow me to mount the inverter in its place.
I also didn't like the fuse box mounting, so wanted to change this also.
IMG_4562.jpeg
IMG_4580.jpeg
IMG_4576.jpeg
IMG_4575.jpeg

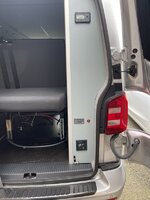
I added the remote to the rear panel, I didn't want any more interfaces on the already packed inside.
Amazingly everything worked when connected back up again, (amazes me anyway).
I have had to add the inverter directly to the battery with a separate 120Amp fuse as it's capable of drawing more than the Smart Battery connect can handle, (100Amp).

I was also able to test the new wiring for the thermostated 12v 300W heater. This now does indeed switch off when a selected temperature is reached - much to my relief.
I've yet to test the 240v thermostat.

My new water pump is still pulsing. Sounds like it might be sucking in air at the exit port and therefore loosing pressure. I've tried to add PTFE tape but no joy. I also added a one way return valve and this didn't help either. I think I need to return the pump as until it failed the last one was working fine.
IMG_4573.jpeg

Really just the water system to sort out, build a wine rack and get the panels back on ready for 2021 season!
 
I know it was almost a year ago but what route did you take your cable for the camera to the head unit ?
I‘ve got a tail gate so the start of my wire will be different from yours but more thinking about the route from the passenger seat to the head unit ?
thanks
 
UPDATE

So, with e-bikes arriving in the next few weeks I will need a method of charging them.
I looked at DC-DC converters and other ideas, but the simplest and easiest method was an inverter. This would also mean I could power a Pixie Nespresso machine with my purchased 1500W inverter.
I initially went down the Victron route, however they stop at 1200W so after some reading of various reviews went with the EDECOA Pure Sine Wave Power Inverter 1500W;
View attachment 107314

It has a remote connect via RJ45 cable than turns the unit on and off, thus saving the 4W power drain when not in use.

It also has two sockets, meaning I can route one to the rear for the bikes and the other into the kitchen.

Once again this meant disconnecting the wiring and re-designing. I think I'm on Rev 4 now.
I wanted to remove the redundant main battery switch now I have the Victron smart battery and Renology interface unit.
This would allow me to mount the inverter in its place.
I also didn't like the fuse box mounting, so wanted to change this also.
View attachment 107321
View attachment 107318
View attachment 107319
View attachment 107320

I added the remote to the rear panel, I didn't want any more interfaces on the already packed inside.
Amazingly everything worked when connected back up again, (amazes me anyway).
I have had to add the inverter directly to the battery with a separate 120Amp fuse as it's capable of drawing more than the Smart Battery connect can handle, (100Amp).

I was also able to test the new wiring for the thermostated 12v 300W heater. This now does indeed switch off when a selected temperature is reached - much to my relief.
I've yet to test the 240v thermostat.

My new water pump is still pulsing. Sounds like it might be sucking in air at the exit port and therefore loosing pressure. I've tried to add PTFE tape but no joy. I also added a one way return valve and this didn't help either. I think I need to return the pump as until it failed the last one was working fine.
View attachment 107324

Really just the water system to sort out, build a wine rack and get the panels back on ready for 2021 season!
I’m toying with one of those 12/230v Surejust water heaters and I see that in addition to the expansion tank, an accumulator tank is also“recommended”. Are you getting the pulsing with an accumulator fitted or did you find that this was not necessary before you replaced the pump?
(I’m just trying to establish how important the accumulator is for my own install!)
 
I know it was almost a year ago but what route did you take your cable for the camera to the head unit ?
I‘ve got a tail gate so the start of my wire will be different from yours but more thinking about the route from the passenger seat to the head unit ?
thanks
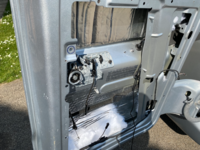
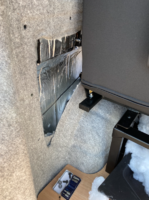
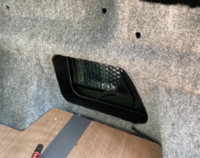
From memory; through the door wiring connector on the passenger side, along the inside of the panels and out through the cover on the pillar. I made a small cut here and added a grommet. The tucked under the ply and then under the rubber matting up and under the dash.
Screenshot 2021-03-16 at 19.19.05.png
Screenshot 2021-03-16 at 19.19.14.png
Screenshot 2021-03-16 at 19.19.29.png
Screenshot 2021-03-16 at 19.19.22.png
Screenshot 2021-03-16 at 19.20.09.png
 
I’m toying with one of those 12/230v Surejust water heaters and I see that in addition to the expansion tank, an accumulator tank is also“recommended”. Are you getting the pulsing with an accumulator fitted or did you find that this was not necessary before you replaced the pump?
(I’m just trying to establish how important the accumulator is for my own install!)
Pulsing has since been corrected with a replacement pump. The new one was faulty.
This is such a small system an accumulator tank is not needed for my setup. The expansion tank is a requirement.
I've changed some of my piping setup too;
Screenshot 2021-03-16 at 19.24.55.png

I've kept the original also, but made this up as it's easier to dismantle sections for fault finding and replacement.
I've now tested the solenoid and switch for the heater - works a treat with the correctly wired thermostat.
 
Simple job today, replace the oil and oil filter and add missing engine tray.
Can't seam to clear the service reminder via VCDS yet, need to watch a few more YouTube videos!
IMG_4676.jpeg
 
  • Like
Reactions: CAB
So I've been a little distracted with other things.
I still need to fix my water pump issue, and have ordered a different pump to see what difference there is, (higher pressure, lower flow rate).

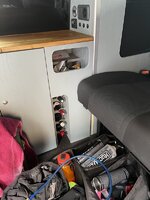
I completely forgot to take any pictures because it was so cold, but I utilised the dead space beside the accumulator to build an over engineered wine rack.The rest of the kitchen could be anchored from this:)
I also made the top cupboard nearly twice as deep to make use of the space behind that too - and added a backlit VW badge.
IMG_4715.jpeg

I used some old bungie cord to secure them in place when on the move.
Then I cut around the original panel;
IMG_4775.jpeg

When the new pump arrive this weekend, I plan to do some back to back tests and investigation on the best setup.
 
So I’ve had a few weeks away with work so this weekend I was determined to get the girl back on terra firma.
I finished off routing the harness for the new detachable tow-bar from PFJones deciding not too try and find the mystical grommet under the brake master cylinder and options to roosters it alongside the 240v cable into the passenger footwell using the coat hanger method
View attachment 59768

Wiring up the rest of the battery side was relatively easy - the same can’t be said for the three wires you need to splice into the two connectors under the dash of the drivers side. There’s little room and it’s delicate.
Anywho- it’s in and I’m not sure if I can test out until it’s been programmed by VW, so onto finishing off the Planer diesel install.
View attachment 59769

Getting all of the gubbings into such a small space meant I needed to take my time and plan accordingly. Sometimes this meant re-routing cables and pipework. It’s neatly packed in and I made some minor adjustments to the exhaust so the cover wasn’t fouling.
View attachment 59770
View attachment 59771 View attachment 59772 View attachment 59773

The tank was almost empty and my pick-up pipe isn’t quite long enough to reach the bottom of the tank so a quick road test was in order.
Amazingly, the heater managed to run on it’s third attempt after a lot of coughing during the second. The heat generated is impressive and the pump when warmed up is quiet.
View attachment 59774
I used a temporary setup for testing.
Packed all the wiring neatly away for another two weeks as I’m off again.
RIB bed arrives a week on Friday - I’m assuming I can install it without the floor down, then remove again for floor fitting.
Hi great work, I am installing soon the planar heater. Looks quite a straightforward job, uncomfortable position but not too difficult. As I never worked with metal my main question is what do you do after ido the 64mm hole under the driver seat for the air duct. Do you use a primer(Rex oxide?) then paint over? And also add a sealant as silkflex to seal the duct entrance? are sealants the same or has to be for high temp? then I have an other question on the screws to fit the heater bracket and muffler. Did you use tek screws? ISEE there are loads looking online . Which ones? And do you need to rust proof with paint that screw too?
 
Hi great work, I am installing soon the planar heater. Looks quite a straightforward job, uncomfortable position but not too difficult. As I never worked with metal my main question is what do you do after ido the 64mm hole under the driver seat for the air duct. Do you use a primer(Rex oxide?) then paint over? And also add a sealant as silkflex to seal the duct entrance? are sealants the same or has to be for high temp? then I have an other question on the screws to fit the heater bracket and muffler. Did you use tek screws? ISEE there are loads looking online . Which ones? And do you need to rust proof with paint that screw too?
I primed and spray painted the hole cut for the heat ducting. To protect the delicate pipe I lined the hole with copious amounts of duck tape. I also secured the pipe in place with duck tape. Sounds Heath Robinson, but still going strong! I don’t see any reason why you couldn’t use a form of heat resistant sealant - probably a neater job!

The bracket to chassis - I drilled and screwed with some self tapping screws with the aid of a hammer drill.
Thanks) Do You need then to paint / spray the self tapping screws?, is there any risk of rusting in mid/longer term?, as the metal is exposed under the screw?…. Or I’m just overthinking and I’lT As I usually do?
 
Back
Top