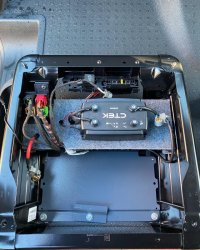
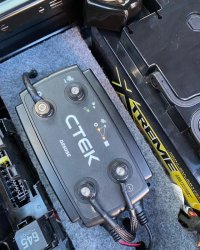
Seat Base Electric + EHU + Solar Install + Charger + DC-DC -- How We Done it --

Very nice. Any BMS for the DIY battery?

Not seen those cells by before... Whats the to spec?...we do normally see calb cells.
The BMS is a Daly 24v 6cell monitor
60amp rating. I don’t need it too high as I’m only running laptop and some phone / drone chargers.
Cells are from a Nissan Leaf battery and are sometimes available on eBay.
3.7v ( 3 to 4.2 volts useable) 65Ah x 2 per cell.
Picture below is a similar unit for a 12v 4cell

B13CEC7B-DA8C-4896-85B7-C1503ED614FB.png

7DFCB4EA-2279-4D53-948A-BE83FAADB5DF.png

7494E809-CF89-4006-B169-2A65E6227C99.png
 
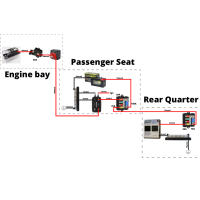
Just about to start my passenger seat install, can anyone see any issues with my plan? Any help would be appreciated!

E875D53C-1E6A-4BD4-8236-5A51BF9A516B.png
 
Last edited:
I think I am putting my MPPT under my drivers seat and running the cables across to the passenger seat battery install. Would folks recommend a midi fuse close to the MPPT as well as at the battery end? (250w Solar panel). Do I fuse the cable from the panel to the MPPT?
 
I am no auto electrician, but my rule of thumb is the fuse is to protect the circuit it feeds, i.e. the cable and the aparatus. The fuse rating has to be rated to protect the equipment with the lowest current. Therefore it should; if the cable size is correct, be rated to the aparatus. If you want to put in a fuse to protect the larger cable passing accross the chassis, then a smaller fuse at the MPPT end so you get "selectivity" great just dont put a fuse in of a higher rating than the bit you need to protect..hope that makes sense. (not withstanding that every connection is a possible increased resistance)
 
The fuse goes before the source, in this case you have two sources: one it’s the solar charger, and the other is the battery. If the cable run is very short, up to 0,5m, you get away with one fuse. If the run is long, you need to fuse both ends. Otherwise you will leave cable unprotected. Also the charger should be as close as possible to the battery to avoid voltage drop; otherwise your charging profile will be off even on a 0,2v drop.
 
I think I am putting my MPPT under my drivers seat and running the cables across to the passenger seat battery install. Would folks recommend a midi fuse close to the MPPT as well as at the battery end? (250w Solar panel). Do I fuse the cable from the panel to the MPPT?

The most important thing is to fuse the high energy source; i.e. the battery end of the cable as close to the battery as possible. Choose a fuse value a little higher than your MPPT maximum output current.

I would not fuse the solar panel input to the MPPT controller.

You have not said which MPPT solar controller you are using but most already have an integrated output fuse and\or over current protection.
 
Managed to get some updated photos, and some are old photos as it was. Without further ado, here is our set up containing most important bits, that serves us brilliant.
6AB6F245-DC58-4833-9293-00E1D038304F.jpeg
This is how we use our portable panels deployed when stationary.

4760A7C3-3693-47DD-B341-F2A9C1244CDA.jpeg
This charger caters for the portable panels, it’s right at the back, with solar cables at the back of the door. 571236BF-07E8-4909-A9BC-868B2B46BDAA.jpeg

The touch screen 7” display , connected to the RPi. The hole next to it was a digital GX removed, it will be filled up with a bank of usb. 971270B1-4C61-4B28-B6D4-57EC3E74F8D8.jpeg
First ultramax 200ah lifepo4, with a ve bus temp sensor on neg post. This sensor is connected to the multiplus above, to control ehu low temp charging, also I can see on VRM what’s the temp in the van. 7B4973482-83DD-45C0-8143-3BFDC6E78E53.jpeg
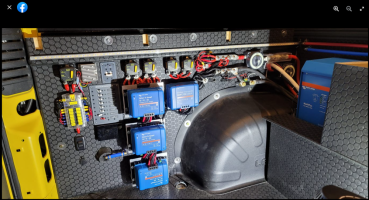
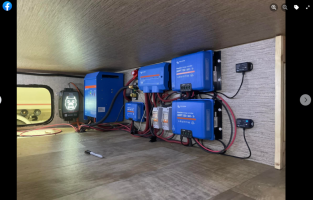
Here I removed some of the trunking covers for photo purposes only. The multi is connected to the RPi via mk3 ve bus-usb interface. The main solar charger, is networked with the second charger, and another temp sensor, to control low temp solar charging. 6785D065-BED0-4B91-A49B-DEA2379713F0.jpeg
Bottom of RPi, with all ports used up. Anymore, and I will need a usb splitter.


To be continued immediately, I can’t load more on this post. Please do not post as ot will split it up.
 
Next
14CDF9DF-5C4B-40C1-A071-C5B08A83C8C4.jpeg
Low power 10 way distribution, fed by a 30a midi from high power distribution.
7C1C5025-F26E-455C-8D44-67346B6DA756.jpeg
High power distribution buss bar, that connects the two batteries, mppt chargers, B2B and inverter. I chose to fuse each battery to a buss, with equal 35mm cable each, and 75mm for the inverter. Next to the left is the bmv700,
Notice, I have beefed the original anaemic bar, with two 15x3mm cooper bar, and bras bolts.
AD0207B7-0379-4542-94C9-B9680AD377BA.jpeg
Poor photo, sorry. Top of the RPi with ribbon coming from the display. Also, it has lan to the router.
7FD166C9-4941-4F4A-A971-9B579CC501A4.jpeg
Second 200ah battery, with the bt battery sense glued on top.

To be continued. Do not post.
 
Next
4A59523E-285C-49D2-A2DE-0A9CE02014D0.jpeg
This is where I keep the portable panels when not used 2x 115 victron panels hinged with door butt hinges bolted to the frame
D0E786E4-4BED-4DC9-BD78-EE581342F917.jpeg
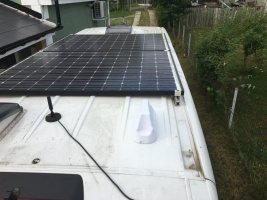
Roof panels mounted with renusol metasol plates and clamps, bolted through the roof, with plate inside. The panels are 88cell panasonic hibrid HIT 300w each. The cells are 5 layer cell silica, amorphous, that works brilliant in overcast, also very low temp coefficient in hot weather; very little derating. Also at the front is a max fan, a mimo LTE antenna at the back right, and turbo vent to the left above the shower.
40B4EC12-FA5A-46EC-93B0-4887640FF714.jpeg
Here is a better view, before I fitted the LTE antenna
7B80C51F-CDAC-4535-9C62-71E504AF9243.jpeg
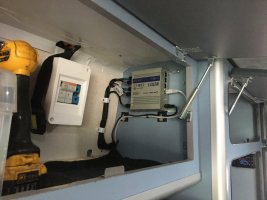
Top cupboard, with the solar fuses, and the teltonica router.

That’s it for now, happy to answer any questions, or receive any critique I may learn something new.
 
Forgot to add spare wheel carrier on the back door hinges and door itself. I had to relocate it, as the space underneath was taken by the underslung gas tank. 98342D82-CB99-4407-97ED-9F76D102D30E.jpeg
 
Very nice @Raul a/3 ....

Loving the 74A charge from EHU,,...the team blue force is stong.

So where's the T6? :mexican wave:
 
@Raul a/3
@Samro
@Dellmassive

Im loving this content, but its a bit deep for "this" general seat base thread.

ill create a new thread for this advance Victron stuff and move it over there.


@Raul a/3 come join the VIP club if you wish - VIP Membership

and also why not start your own build thread over in Crafter corner, - you have a wealth of knowledge and experience that will be beneficial to others. - Crafter Corner
 
time for a quick swap over . .

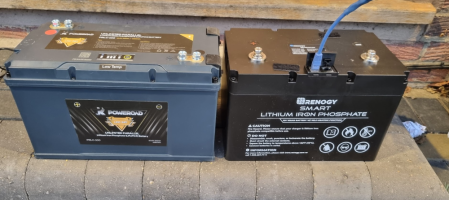
im swapping out the POWEROAD 100Ah for the Renogy 100Ah . . .

The Poweroad has been in the van for a good few months now . . . . its time to put the Renogy in,

Before i fit the ROAMER.

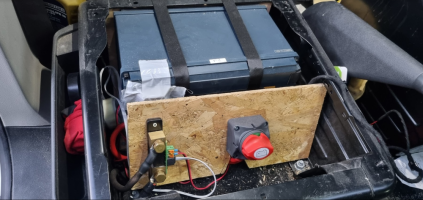
this is whats in now . . .


1642445708834.png

Poweroad lifepo4 + Victron BMV712 + Battery Isolator switch.
1642445755745.png

1642445772056.png

once out we have this . . .

1642445795807.png

Im pulling that Renogy out the battery box . . .

1642445831556.png

side buy side they look like this . . . .

1642445864948.png
.

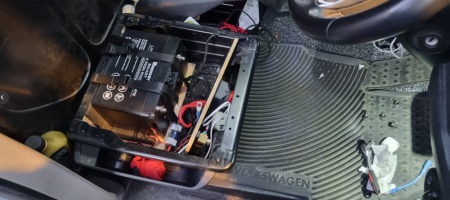
dropping the Renogy in we can see its not as wide . . .

1642445923435.png


Which leaves extra space down the side, for the BT-2 bluetooth module and the BMV712 display screen.

1642446006810.png

...


it fits fine . . .


1642446035662.png


.

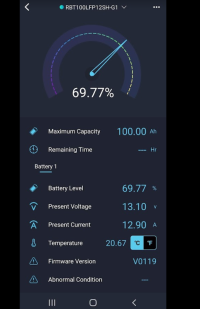
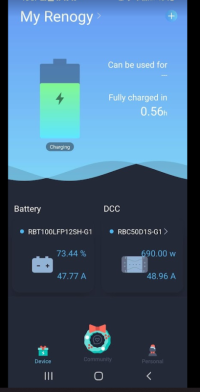
running the Renogy APP we can see the battery & the DC-DC charger. - delivering the full 50A at first.
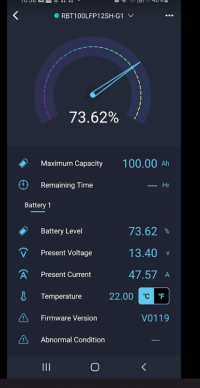
1642446073701.png1642446084365.png1642446094541.png


...

i then CURRENT LIMITED the DC-DC charger in the settings to 20A . . .

the dc-dc can be set for 10,20,30,40,50A

1642446169549.png


you can see 20A from the DC_DC, but only 12.9A into the battery . . . . thats because i have the inverter running charging some work batterys . . . that using the other 8A.


.1642446260979.png

switching off the inverter we go back to 20A out, 20A in.

1642446294161.png


...


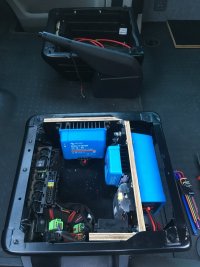
this is what it looks like from behind the seat . . . Excuse all the dust & dirt - its a working van after all !!


1642446364303.png


...

Ill post some BM2 screen shots after a few days . .

1642446247926.png
 
Back
Top