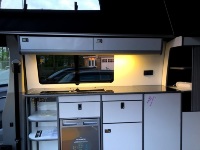
Self Build Camper Conversion, Second Times A Charm.

SkyMonster

Member
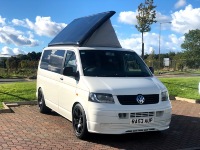
Back in 2012 i bought a a white T5 as a fun project to convert into full camper as much as a hobby than to have a quick get away vehicle for myself and the family for affordable holidays. Over the following year i learned the ways of the trade through this great forum and built myself a camper. Doing all the work myself and things i never thought i would be able to do. Its served me well for the next few years till 2018 when i decided to buy a new T6 and fund the conversion with the sale of the camper.
FGx0U2waydOqjqX_4ve3or3whDP-Jh3CCDwwHinjILimhiYDnKeTSG9rMyXDN9GrSeAY1ngRcxxER6mSDQ=w1320-h990-no.jpg


I had decided that i would get more of the conversion done by other companies as i ddint have the same mojo as i did last time and didnt ant to get bogged down on a lengthy conversion id never finish. So i arranged with the company fitting the Hilow roof to do the carpet, windows and electrics so i would be left with just the fun part, the interior. Cut a long story short after the quoted 4-6 weeks turned into three months with only the roof fitted and got my camper back and decided to do it all my self.

This is the start of the of the new conversion. HiLow roof already fitted.

xJ17OtbEy-VKCNzF3s2jl889C3U5_mRgMJ59L3ZB6fxJzXToc5aOBtg9pFRYNm0_-7GOJOrVAKLOfnnMsfsi_NLSI98868aafmzz_fe61CU46rRtYL9Xz3IumA8rL4GdPuTWRoH0qWAoDEQFc1epqqrSbwoEpeacHLm_7V6JVX8tuahJoqJMqcrkhQCPZLgltsLJP--2m5IDaXym42tzlm3Eu87I8EXv33ZRSW83Hk1Gpnl9bO7vRjXUi78jtoAawZjGxtpC8Y3-wKNrxX6QPppz_LXJWuPn58Q11fO1b91FNzCp0ShhH8r43vVloZZKFAZUubiq5QOaQrzOK6WAsYudmYOe6grF1h56Su0Wxpj_64feikTM8xbeWM6JIuYSbH-txeLIioYsDFUp6zcVxP86_yCSZIYCr4B-xw3krvQZCAVI7tn-xF5_3070ZTEDHmeLXH7zfJNbiOmYcjKx8Yjc02ATONWBIFowvcZH0XSlSgfD2PqyGJ9chs7q6taoqhnq-ksa-lEgQ-mjHCRT56tsLUyxIa_L6JC6fXAyxP7QeI6TzKLAFZCNi4go5K_Eq4m_g09awvIe1BNzA0ILxwAmUpZkMVfv0UcuNIuDShAYC067JOQU1MZZAs_uikLVGZsK0yeOW61_eAZCRrCLRgkklQmPVTri=w1344-h1007-no


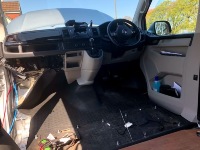
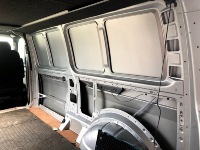
So first job as always is to strip out the interior. Fortunately as the van isnt very old its very clean behind the ply and required very little clean up.
9jQSOjfboXEB953x__PP2p9FKQhIvBp2yoAnu6qSXQ94nHfqE6vyx5b8y-qUyBXl3Rqz5LlaLLoNSz2kuUA=w927-h695-no.jpg

On my last conversion it was all about budget. Doing a good job but keeping the cost right down. This time round within reason it was no expense spared and i wanted to do it right, having the budget this time i didnt last time.

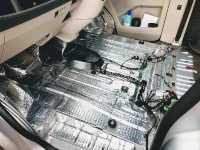
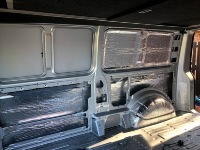
Sound deadening c/o Silent coat and a Dodo thermal matting.
6EmY3jzQg7G-x5Uq5fMPsDvX5VK3JGbxJLxNNqVQS8LqLjA_gJ8nlKq5F1UaUMNk8zJh3R1osr_lDTzpV54=w927-h695-no.jpg
 
Cab floor getting the treatment to. Seem right seeing the interior was out for carpeting anyway.

MTR2bAZRmnr-DuBlzmv6wIQQRlhgo2PPz29OUP1V1vlR9dcX7X2PxZKddHT5i66RjroDhwogSyhvCMQKCRp=w927-h695-no.jpg

As with my last conversion I was bricking it over fitting the windows. I should have been fine as i had done it all before. This time i would be using a set of Electric Shears rather than a Jigsaw as alot of the Youtube videos had gone that way. In hind sight i should have stuck with what i knew rather than trying to learn a new tool on the job.

Firstly removing all the reinforcements from behind the panels with an angle grinder. (my first time using one of these). remember to cover up the inside of the van and also exposed skin, them sparks are hot.

2bxgXZW5PmkUXva70SUWHjIslXNFCXOAqj4CtYvvd2toCc5hMLRSrak3SJku94_-7fIjygvS8EfIcxbht7R=w927-h695-no.jpg

Using the inner edge as a guild i drilled hols to act as a marker so i can draw lines on the outside of the van. With hind sight your better off just marking with a centre punch type thing and leave tiny indentations. I figured this out halfway through the last window. Doh!


blj6eJYSghOcM9a98AsGxz-G3ImqIZwxELqWFRaOdwBOkUob5l-1IPoUMpKdsywVBnef4T8QtO7WHoU7jfjRzWcAxElLQ2MHH2t4yPuV8z2Jh9ya-UcmdxpHyrvKgNSyjHP4h5IZRHhjge9w3up228NqakPunQvyk8AcjtMgBwV_fwBrqqSR66sRi7kL1gNeF6MoNMyWTriimAQWUKb9e7nV1pVVhIr1N3zn5nk-dV2nveZHieKwirbuYkcmi_kdzsFpRg73mRgW9M87IBwDGWEywFHI55HNHeW5-9kQOldGsR-M_VktkbmcDEVLC73KWZ_iJXwUVDr___bqHcnPrLLzO4PPQAa3VJvyAia3Vy98knri46vHn7EER0Xjr_9bYVf9NcvBBr_TzbHMfnDqxl-AxKQsjdwVpYF0d7ByWgiU8UMW_i8yrK79Vhs-UYCBeir19X9nl1lIH42NySU-0GcV7nGZUFDltIYNNt6YnK9UyVfOSsIUgkqYQdf_T0K2qLXRULv4E6aXfBqWRAuyYUPkjsGBDbdtdLZmFv4dWjT_8xtdgOzWot3eGH-5He3KsYC68ESip1AGi71xugMGaL1-iirFJ7gD7u2ybkECJVMRrSMxrGZ8eh88PVL6lM0HJ1BvkgfXCchRER6ChhUu4Iof8JzN_=w927-h695-no

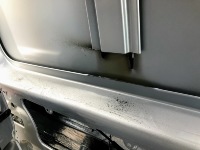
Jigsaw in hand i cut out the first panel, remembering to mask off the outer area for shards of hot metal which can embed into the paint work and rust. I also treated the cut edge with primer, hence the ragged looking edge.

PCPZRvmb6jkcKDeOb39V8rDSNy3UuBtUvFfxvWa0KB-3AK_iuTM05vc4JPd2_XwgkNCRKK3-8g0vFCgJSly=w927-h695-no.jpg

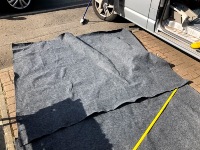
Im carpeting at the same time so i can roll over the carpet over the cut edge for a more factory look.

WFesJosffBj06jnTqXAw1uOfKjOz7mtp9v6XxBGZ0ObgoZDh_iEOhXLKnWBtfkXhqgdGrbw9CAfOCnlSzZQ=w927-h695-no.jpg

Boom, first one in. and prepping for the dummy window at the rear. Its a Blackout glass so no need to paint the panel.

hniCnjSgrDzoSlAzEhYfiQ7H85dBcTnZocMnn8UWEZ-0E6N5NWMildcuNlHKNLC2P6p16U8OCnHP_mL_tMh=w927-h695-no.jpg
 
Oh did i mention this is how my back windows came c/o DHL. Glue anyone!! Fortunately another set was speedy dispatch to me. Unfortunately this would be the first of issues i had with CamperGlass.co.uk windows.

Iq1-euPhwbrfdxZD4aV2nyGfwNEErLB_qWJggampncnvbgEOc6sPkAJQCsw9Ejanjw30U6JmB8z1AmVDiEm=w927-h695-no.jpg

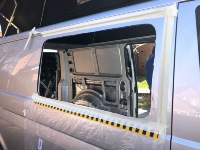
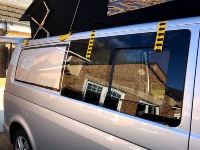
Finally all windows fitted over a weekend. You could do it in a day if you dont faff about. To be honest if you can afford it id get someone to at least cut the holes for you as it is a bit of a ball ache and quite messy. One thing for doing it your self if your asserting your self as alpha male in your street all the other men will think you have balls of steel for having the nerve to cut up your new van.

mfC6eRk0Or5XpaxEfzTNTO7vjSA_XRz8OItZaJSY-CpTWPWIlB2j7HjL43TnW39fw8mExD0JZCOpSxt3Y9a=w927-h695-no.jpg

Finishing off the carpet on the inside, although the entire side wont be seen once my units and splash-back are in you will be able to see when the unit doors are open. Looks like there is a difference in the two carpets but there from the same roll so must just be the direction of the pile. None of this will be seen once the Kombi panel is in.

KlhmYA0P1ibfQA3FkhKWpmbry5i50p8-svHYjnYu-8zj1bcJ43hQigKP5rlikBZ_vp8a14I2Zpaq1c9cDDCNMFKaQxU1Wbmnu5BdsTN4c7EVO6fEY7CBaWGrCv8ZPdE6LloVsqkUk3DWuiZ8rh3nLSBb1LZYmWORh10Idow3CYe5IBJ7i8_jkkVGYso9AyOce3-otNsqNRXd_7X6WnI6vZ7MHOyemjBT2wQ8aHwW__3_zqIYaU_tzC77HLxFia93_p4l0V-jfvryY_tlo0-6msTcWYSEj8_2SasVFsvyzAdICLi3HmJRbsRsGteGWOA7xqkWKa0kAGO4QayqA7b5PYzlxH09GJnjDmD2ffP6rVEwYokDqtUryy-eI1_1m5aD0M_vrQGdex6J6i9dMGezGNTMPpF2HeQHoWzsVDgwQwSakuoVwbK-ltaPv5G-z-xV2WIvZwHffjX5GJdSWanMhKowE2-aqkaKx4CvW20HRc8uS1CMSkCLzrcjOe4SreSSPN2utSRubPz17tH1Z5aMvQKB3wvmNxQE4f4FOyKbP4ZqU6jaf9N9rML7EauBkU6MOP9qxqjpjLfzPrm-ecW8oxMw4CDp3wS0JWXpU0aRF_i2pi0PE_HU1tVUSXl9cClug8cMKRGuQUvZSqDvkQtjGIibRArEcAkc=w1320-h990-no
 
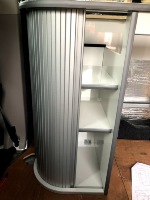
Started building the EvoMotion units. This is the slowest part yet. Instruction are not the best and the ones i got are for different units.

They also state on their website
"New curved kit, a slightly more challenging construction than our other designs this this kit is suitable for people who are handy Diyer’s" The how to video they refer to on their website is for building a drawer and that is it. A half day of building and only get half way through the first part.

iZYVE7jCIhaLb56r4aY8Ka6ixD3qbijvdVjGmMAy6U8IC1zmNYm4Cp3rC3IlH1tb5AAC9eYWd12KyiR2LfyPru3tdwnJIUWz08AIHJ-3dF8_uObtNdaePB9X6LdnIOfE1LYamRbBs-asmw4JnY7sFDyhUUOuXOjxJrrYbBbpy0mPjQ6U69kpVE_8Jag2VLWMD57KmCl3c3mKYllmGsTB8ma5hrKsLupNsyjGAZEiVrKBY48wDP81xii0tCNdmjJVOqxCgdOEmbon2Q3oINo2ngDNLg67wO2XSE8cB3vtwtzWeIgTvUg88NeJpjqiP3QL8Na9sKoDKG8PI4yfZkoCZwDe0xo2YuVZi2BI_GP-uCbiiMd02LRLL6K9Li968fHuLnp2LvRELeRblnd4yeCypGnA4ck25nXL5zrFAZhNy6WI-hxdDRwaiwBeYWA03MwuD-KgoJbtSJqCsp5wRRsiYjFY5XKIW62XHK0D9kehgQhCYITj3EP2Umc1V17jmTa-XoALiX4uK7CHKQKyA-deNSdagKxHeCb7rEeL0R6tI36reIB4ckPYxP-2R4j5GSZlXXA51z0Pe0I3GnsyTKsdTwz_aV4hJ0CjRYi0HHtK6Cj-jU0Xc1BUYjFGyVLL_tnialuT0eoAvDiuHs4TQHPksBXwTSEkpTAX=w1320-h990-no


Nice bit of sliding door.

VxZEJbNNNSFDtXSxXKzX-ZOEivaVfo5daB637lWmZ12SUdIGkYMzpbhC2WRNDQFctEFnOMqvvjwWmu05PQX=w743-h990-no.jpg
 
Good start. I know what you mean about the Evo instructions! Absolute pants they are.
 
I did find a video i used last time i built one of there kitchens. I think it may have been an ex employee that made it and no longer works there as theres no link or reference from their website.
 
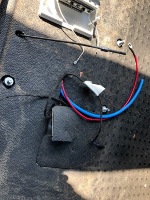
Feel like im going over the same things time after time as I've so many orders stuck in shipping and needing the van for daily transport. Fitted the 240volt hookup i got from @travelvolts and as always excellent service and kit.

WxqrKsC-EafSrWF_2EwaVK18XKlweFGI131y1SZt6OXxTLjxnpJj3cDXA1zfqSucCZy-NJF_m6kWdK6Lh=w1343-h1008-no.jpg

Unfortunately i goofed up with the mains cable as it was only long enough to exit under the seat so this will need to be extended to reach the cabinets. The red battery cable will be for the Ctek 250 which will be under the seat with the leisure battery.

Y0SvriJP3r7xJaCy1ajmNkHd7tE97toBGFslnuvvMhflzlwIXX42iVNzgqimWFSfjhm4O8u3CcCgbPgSOH=w756-h1007-no.jpg
 
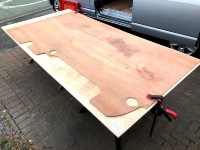
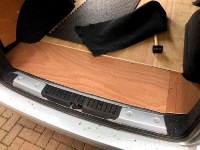
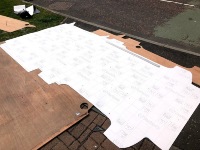
Ply floor time. My original intention was to buy a pre cut floor but at £120 v`s two sheets of 12mm ply at £40 then diy was the way to go. Used the old floor as a template. I did rejig it from the picture as i wanted the joins to be under the cabnet and under the bed.

5GV9_qbB9nUcmLfA1oXsV50PeiMdkyQMM7fSIFnj4cf8XdaxWmBYSuCYAEKwUFBRKEQH_pozEhlA84TmK5=w1239-h929-no.jpg


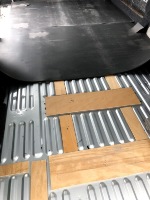
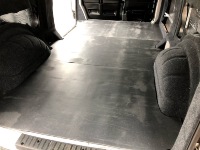
Next was the battens on the floor to support the Dodo Pro Van matt which I glued them down with Silkaflex. This matt doubles as sound deadening and thermal layer in one. Not cheep at £180 but i did notice a big difference. I got it from Sound Deadening Shop. Highly recommend them for product and advise.

ff6vCel29XpnVn5r-F0_I-n2mpUZzd1h2s4O8hwsuBn2twNxA2eKeaTPJB3Lel4KCz8SPkroKZna5HxjkVx=w698-h929-no.jpg

J4HDlv5hHtHH0zuHAsHIyB60eyXZ5m259ZBsaAWba8c1qkAi_F7Cjx_7-y_cWg_XgWjph2d9aAp5MxTmJz=w1239-h929-no.jpg

Hot tip, if you have a LWB you still only need the swb pack they sell.
 
Last edited:
I really enjoy these DIY builds, great stuff, a few pics need re-uploading or a different host?

:cool:
 
I havent updated for a bit as i decided to do a binge session and took a week off work to get the conversion finished. You can get alot done if you spend 12 hour days on your build.

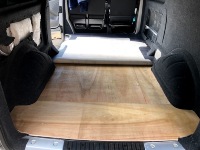
So following on from the floor, turns out the local timber yard gave me two different thicknesses of ply, one at 11mm and 12mm. It doesnt seem much but its enout to cause a lip under the vinyl flooring. It was really only showing up on the rear part of the floor so i cut a shim of thin ply to go under the main floor but im not convinced it really helped.

z8bn45CajpeH6Ehrc3vMeqN7s3XEfA6I0K46qC1T68FcCUkdGJt78mgUXx3B1i0U_Epl8Vjcba9AeydSfg=w1320-h990-no.jpg

Once that was screws down it was vinyl time. I was running out of time so my original idea of using a hi-end flooring was out the window so just grabbed some off the peg stuff from a local store. In hind sight this is not a great thing as its typically to soft and not durable. I used some of the carpet glue to tack it down as i will be changing this next year as i know it wont last.

NahanPEB7wMo9z17Po8mQpY9w6qnnjz7Q4cr6_ImusVfTXCcWwzlaVKYmtUU1VHySlAALlOcsxIGstc8ew=w1320-h990-no.jpg

HRkmtWXd3QY7LEu0nwPuwKy0VkL3rTRXt3HOoOJ2TbaepXLEGoQd18hP_tD0H9RpxOvPFwMvZNrMx8cUMg=w1320-h990-no.jpg
 
With the flooring down i could get properly on with the units. First snag i realised was the floor was now around 7mm higher as the floor was thinker and i have the sound barrier mat. A trim of the units was then required. As it tuned out i trimmed more that i needed and only a few mil was required.

97DdWR8-74Yszy4B3cXFP7FTGWi0vjvdtqiy0zwEFEN0Wj3cpTxji-ZaI-Uwhf-fwVUNPKeDS6ASZrZh7w=w1320-h990-no.jpg

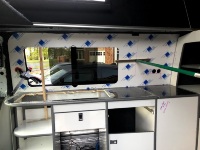
Before the units could be properly fitted and splash-back with blind needed to be done first. These are glued in as you have already carpeted and the back of the splash-back is also carpeted. It worked very well. A small cut was required before fitting as the splashback would be viable from behind the tall cabinet when it was opened. I wanted the join from splashback to carpeted trim panel to be behind the first divider in the cabinet.

1zZPtuCPODfZMkys8LLOdWQzm2kgT5xCvI2ro3c2wij5JrP7M3WpHiuiJLaan_GBNMeEsQilBznYFBeRmg=w1320-h990-no.jpg

nlc3l8tuaEZH_KJN3l9N1TnntiUZc6qnReHzYmKeB_ZmsL6W6SUvjS8anYX5cofDJYwMC7XKfMY1uORwdA=w1320-h990-no.jpg

dXSu3t7JS7-7wGG2VcOK1So-kK-m693LlthYqRWnxLfcI5T0WXA9hei5rGJRk27KZuuLh8rzGRe7Xw03Bg=w1320-h990-no.jpg
 
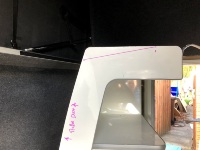
Fitting the over head lockers possed another issue. The internal trims that Vandoc fitted along the side of the pop top were not flat and twist as they go from back to front which is no good for a locker that is made to fit on a flat surface. I removed the trim and shaved off one of the wood blocks on the inside to help make it flat. Its not perfect and another job ill need to come back to on the refit next year.

XG_YJbwD7Aex212gD7DNGoKJRBwnT489ovDeIBEKsyxsKU1GO4EmBOfZCOlMpxEbk7qAobNbbw2_M1YFF6Q=w743-h990-no.jpg

Looks fine when fitted but it rocks a bit.

PRaP0x0HIPbyFInHhUdj31mYsmuvNVjnUlxcdoCHPIM_sUeKAJD7tSTCjpnZTAiYE-b_7XcIP01CExhAEw=w1320-h990-no.jpg
 
Back
Top