Dellmassive`s Camper Van Adventure

EHU - 240v + fuse box


++++++++++++++
after doing the rounds over here:


+++++++++++++++


Just to wrap this up (for me)

I've decided to go with:

1x wylex 3mod IP65 CU
2x wylex 16A RCBO DP A/B Mini
1x wylex blank kit.
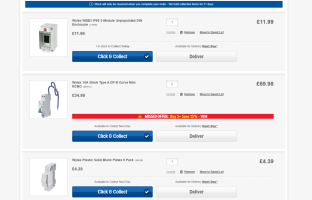


1743790399805.png
 
Then we need to sort out the sink and Fridge. . .

Transporter HQ – Camper Fridge Freezer – Alpicool THQ50 – 50L – 12v/24v – With LG Compressor​

£330.95 – £389.95


View attachment 279882


THQ Alpicool THQ50 12v/24v 50L Camper Fridge – with LG Compressor​

The Alpicool THQ50 Camper Fridge uses a high quality + high performance LG Compressor meaning it runs quieter and more efficiently than a lot of similar fridges on the market. This fridge works with what’s become the industry standard dimensions to fit most camper kitchen set up’s. These are similar to the more expensive fridges like the Dometic RX50, plus this Alpicool THQ50L is package with more features.

The THQ Alpicool THQ50 features a clever door hinge system, meaning it can open outwards both left and right which is also removable making it a lot easier for cleaning. This feature means you can fit it in many more kitchen layouts and in far more compact areas. The removable door also makes it easier to remove or reinstall the freezer section. Removing this gives you the option of having a large fridge space without the freezer section. The other huge benefit to the door opening is you have access from ways. So whether you’re reaching for the milk to make a cup of tea from the back of the camper, or chilling in your front swivelled seat and want to grab a cool beer, its easier to access the fridge from either direction.

With the Alpicool having the Dual Climate option, you can store a range of different food and drink products at a temperature which suits the whole party.


Features:

  • Digital LED Control Panel
  • Dual Temperature
  • High Performance LG Compressor (quiet and more efficient operation)
  • Internal Durable Wire Shelves
  • Stylish Brushed Black in Colour with Removable Trim-able front panel
  • Reversible Door (opening left or right + removable)
  • Secure Door Catch preventing opening while driving
  • 3 Stage Battery Protection System (Automatically prevents the fridge from draining the vehicle battery)
  • 2 Year Warranty

Technical Specification:

  • Model: THQ50 – with Uprated LG Compressor
  • Capacity: 50 Litres
  • Dimensions: D479mm x W380mm x H536mm
  • N.W: 16.2kg
  • Operation: DC12/24v
  • Rated Power Unit: 60w
  • Rated Current: AC 1.2A-0.5A, DC 5.0A/2.5A
  • Chilling Temperatures: Fridge 0 – 8 °c, Freezer -12 – -20 °c
i just realised that this THQ Alpicool fridge has Bluetooth !!

result, . . no mention of that on the website.

Same APP as the other portable fridge we have.
 
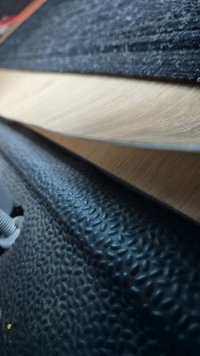
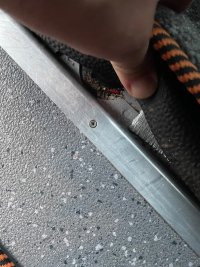
What do people do to finish off this edge between the rear floor and the cab floor?.

I'm thinking 15mm Aluminium corner trim?

..

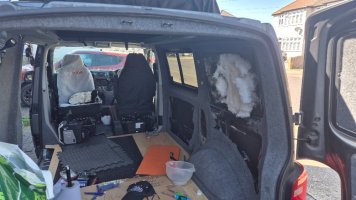
20250406_111247.jpg20250406_111256.jpg20250406_155513.jpg


...
 
  • Like
Reactions: CAB
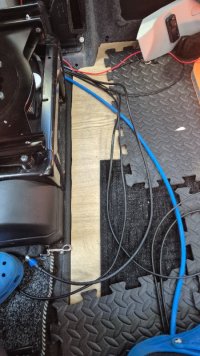
Time to first fix some cables....

Running links to kitchen splashback area.. the splashback will have 15mm battons, so should give a good gap to get cables down.

Was going to go.low level... But that would mean drilling some bodywork to get between the sections.....

So I'm going topside.

I'm going for seat base to b-pillar trim.
B-pillar to roof shoulder, and along poptop cover trim.
And pop out at rear quarter from the top

We have......

Two singles for solar panel.
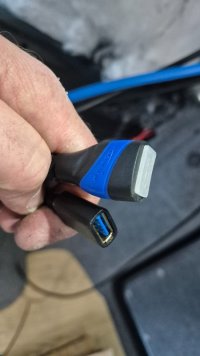
HDMI cable extension for Cerbo screen
USB cable for Cerbo screen
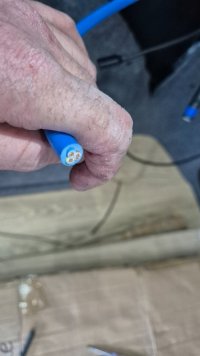
4mm twin core for 12v power.

....


20250406_152523.jpg20250406_152516.jpg20250406_152459.jpg20250406_152508.jpg20250406_152450.jpg20250406_152441.jpg20250406_152435.jpg20250406_141739.jpg20250406_135744.jpg20250406_135734.jpg


.....
 
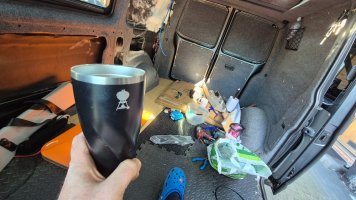
While I'm sitting here in the front swivel looking back with a beer....

20250406_160636.jpg


.....

I'm thinking, that twin 3mm I've run in...

I think I'll double it up for POS power, giving me an effective 6mm2 to the back section.

Then just run a 6mm2 NEG to the rear D-pillar chassis ground.


.....


20250406_161027.jpg20250406_160529.jpg20250406_160557.jpg


.....
 
I think my flooring is probably a cm longer than yours, the front rubber matting goes over the end of the flooring nicely, still leaving a nice channel to run the odd cable in front.
got a few pics?
 
While I'm sitting here in the front swivel looking back with a beer....

View attachment 281765


.....

I'm thinking, that twin 3mm I've run in...

I think I'll double it up for POS power, giving me an effective 6mm2 to the back section.

Then just run a 6mm2 NEG to the rear D-pillar chassis ground.


.....


View attachment 281766View attachment 281767View attachment 281768


.....
Interesting. A couple questions if you dont mind.
Are you going to have mains power in the panel behind the slider?
All the Victron components going under the passenger seat?
WHere did you connect the neg terminal of the battery to on the van? One of the seat base bolts of the OEM stud. I'm guessing the OEM stud wouldn't come with the currents?
 
I think I'll double it up for POS power, giving me an effective 6mm2 to the back section.

Then just run a 6mm2 NEG to the rear D-pillar chassis ground.
I think that's a good idea, just make sure it's very obvious what you've done so in 2 years you're not fixing something on a campsite in a hurry and put the black to ground...

Maybe crimp both cores into the same lug?
 
I think that's a good idea, just make sure it's very obvious what you've done so in 2 years you're not fixing something on a campsite in a hurry and put the black to ground...

Maybe crimp both cores into the same lug?
That's the plan... Crimp both cores into one lug at each end..... So it will be a doubled up POS.

The van chassis is the best NEG busbar you can get., so I'll use that for the NEG return.

Going to do the same thing with the 3kva inverter.....this 70mm2 cable is beefcake.

So I'll run a POS feed in, and then use the shortest bit of NEG cable as possible and nut and bolt it through the body frame near the inverter.


....

20250406_180920.jpg20250406_180856.jpg20250406_180839.jpg


....
 
Interesting. A couple questions if you dont mind.
Are you going to have mains power in the panel behind the slider?
All the Victron components going under the passenger seat?
WHere did you connect the neg terminal of the battery to on the van? One of the seat base bolts of the OEM stud. I'm guessing the OEM stud wouldn't come with the currents?
No, just kitchen side ov van.(DBL socket on splashback and DBL socket on fridge side panel.

All apart from the Vic inverter.

Seat base bolt, stud cut off when battery fitted, that stud is only good for 20-30A max id guess. ( The inverter will pull 100A per 1000w so id expect upto 300A max and 100A fairly often when the coffee machine and kettle are running.)
Haha, I just looked again. The pic with you, glasses on top of head and blue 3 core in the background is flipped. Thats where I thought the mains sockets on passenger side.

Thats certainly some chunky cable for the inverter. Whats the route going to be to get to the battery? I didn't think there is one?

Its all coming together :thumbsup:
 
Back
Top