So, after my first weekend away in the van a month or so ago, the cars around me on Sunday morning had frost on them (up the top end of Swaledale near Keld) The single 25mm duct I had installed just wasn't putting enough of the air up into the pop top (mind you I made the mistake of turning the heater off around midnight because I was thinking of the people in tents either side of me- shouldn't have bothered, they snored like troopers all night and by the morning I was freezing and they could have died from carbon monoxide poisoning for all I cared) so I have fitted a second 25mm duct to supplement it.
Now, the first duct runs up to the drivers door side of the seat belt inside the plastic B pillar cover but outside the B pillar itself, there is room in there for it, I have fed this duct straight up through the roof into the pop top via a bit of 25mm carbon fibre tubing cut and stuck in place using PU adhesive from toolstation.
3K Carbon Fibre Tube Matt 25mm OD x23mm ID.20cm,30cm,50cm,80cm,100cm,120cm,150cm | eBay I've also used short lengths of this carbon tube to join lengths together using single ear mikalor/oetiker clips
Mikalor Single Ear Plus Stainless Steel Hydraulic Hose O Clips Clamps Water Pipe | eBay
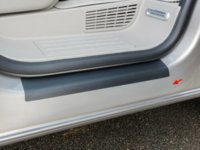
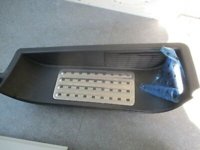
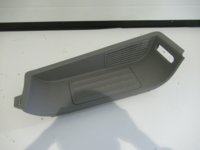
The bottom end is fitted into the forward most part of the air guide clipped to the bottom of the B pillar, via a 25mm hole drilled through the top and I've blanked off the duct behind the grill with a bit of aluminium so no air gets out into the van via that small grille anymore. Ducting is secured using the PU adhesive again.
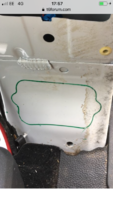
The second duct I managed to get inside the B pillar itself, going into the pillar at the bottom to the right of the seatbelt, and brought it out right at the top of the B pillar via a 28mm hole I've drilled there, this duct is then fed all the way down the right hand side of the van inside the metal bed base side fitted by my pop top installers, out the back near the rear door and then up into the roof again via some more carbon fibre tube stuck in place with some PU adhesive again. The bottom end of this duct is stuck into the forward most part of the rear part of the air guide, again, blanking off part of the air guide outlet so all the air is forced up that duct, I have about 50% of the total volume from the heater going upstairs and 50% left to go downstairs.
I don't have any pics to hand but could take some if needed.
I suspect there will be loads of people saying I shouldn't have drilled holes in the pillar, but I've now got an enormous one in the roof since the pop top was fitted and I doubt a 28mm one right at the top is going to be the reason I die a horrible death if the van is overturned by a train at a faulty level crossing some time in the future.
The ducting
57cm Flexible Combustion Air Intake Hose Pipe For Webasto Eberspacher Heater | eBay does not get hot and I've not seen any effect of heat on the PU adhesive I've used to stick it into place.

