Hillside Birchover

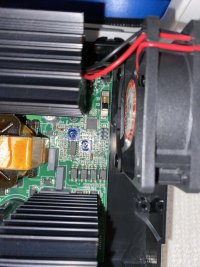
Sarah, you’ll see the location of the ‘DIP switch’ on Page 8 of the User Manual. As Gàirnealair says, to access it you’ll need to take the cover off. This switch is referred to as ‘the Charging Line Selector’ at the top of the unit (with the cover removed). If it’s the CB516-3 model it should have three positions A, B and C, otherwise it’ll have just two positions marked A and B if it’s the earlier CB516 model. To be honest it looks like it’s going to be a challenge to access it. Hope that helps.

@Captain Quick Many thanks for the link to the CB516-3 manual. Where possible, I like to have PDFs of as many of these sort of documents as possible (never know when you're going to need them, and they don't take up much space on an iPad).

@sarah_86 - if you have not already dived [again] into the depths of the cupboard where the charger is hidden :D, please think about doing so:

When I bought my Birchover, one year old, minimal mileage, great condition, bla bla bla, it was quickly obvious that the Leisure Battery was knackered and would not hold a charge. No amount of Recon cycles with a Ctek charger made any difference so I assumed the previous owner had over-drained the battery and I had a new one fitted. Yes, I could have gone back to the dealer and made a fuss but it was simpler and quicker to fix it myself.

In the process I opened up "that cupboard" and had a look at the Split Charger. The DIP Switch that @Captain Quick has directed to you to was set in the wrong position (Lead Acid instead of AGM) which I think will have contributed to the battery problems. I'm not knocking Hillside - they build a damn good product, but it is assembled by people, and people make mistakes, get distracted, and things happen . . .
I haven’t been back into the cupboard yet, but will do so tomorrow.
Having read the recent posts I’ve missed on this thread it certainly seems a good idea to confirm the switch is on the correct setting for the AGM battery type installed. Would be an easy thing to miss on assembly and if the switch is under a cover it’s also not the quickest thing to check in a factory either.

Will report back tomorrow!
 
A couple of questions if I may?
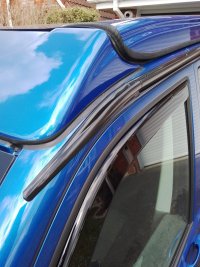
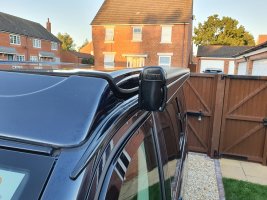
I’m thinking of fitting a Reimo multirail, but haven’t seen one on a Birchover. Has anybody fitted one?

If so, how well does it fit around the roof “spoiler” at the front?
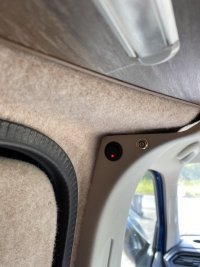
Are there any wires or such in the passenger side roof area to be aware of when drilling?
Finally, I suppose the stick on gutter above the door will be redundant, and able to be removed?
 
I had one fitted by Hillside, so can’t comment on wires, but presume if it wasn’t a problem for them then it isn’t a problem.
The front trim piece came unstuck within weeks (it’s only held on with double sided tape) so I bonded it back on and it’s been fine since. Would look odd without it.

IMG-20230314-WA0008.jpeg

IMG_20230418_111440_048.jpeg
 
My Birchover is currently being built and I’m having a Reimo Multirail fitted. My rationale is that a wind-out awing is easily stolen and puts weight high up on the vehicle. Given that a Debus sunshade takes about 6 minutes to erect and attach to the van, and a Multirail provides a useful gutter preventing rain dripping in the passenger side doors by channelling it onto the front windscreen, it was a no brainer.
 
Thanks very much, the pictures are much appreciated as I wasn’t sure how it would sit at the front.

Now to find somewhere to fit me one!
 
Are there any wires or such in the passenger side roof area to be aware of when drilling?
The VW wiring loom is not close to the skin in that area. Hopefully any additional cables are attached to the original loom.
When drilling use a stopper to prevent the drill going deeper than needed, a piece of tight fitting hose works well.
 
@DXX - wot he said ;)
It is not VW wires you need to worry about, but anything which Hillside might have bunged up there.

Two possibilities: the first is whatever goes to the switch for the high-level uplighters which illuminate the upper area once the roof is raised.
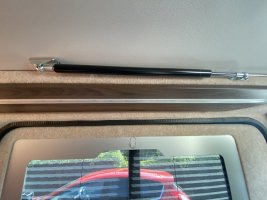
The second is the light-strip which runs the whole length of the van.

IMG_0473.jpeg

IMG_0474.jpeg
 
@DXX - wot he said ;)
It is not VW wires you need to worry about, but anything which Hillside might have bunged up there.

Two possibilities: the first is whatever goes to the switch for the high-level uplighters which illuminate the upper area once the roof is raised.
The second is the light-strip which runs the whole length of the van.

View attachment 201677

View attachment 201676
Yes, those were the ones that I was concerned about. As I understand it, there is no double skinned area over the slider, so anything in that area could be vulnerable.
 
Yes, those were the ones that I was concerned about. As I understand it, there is no double skinned area over the slider, so anything in that area could be vulnerable.
Not if use a hose stopper on the drill, you only need to penetrate the skin. You would need to be very unlucky for the converter to have;
1. Attached the cable to the skin.
2. Attached it in a way that it isn’t deflected by a screw / drill bit.
The easy option (the one 99% would do) would be to follow the existing loom.
 
Yes, those were the ones that I was concerned about. As I understand it, there is no double skinned area over the slider, so anything in that area could be vulnerable.
I’d be inclined to use a drill stop on the drill bit and not allowing the bit to penetrate more than the thickness of the roof panel. The safest approach though would be to use a borescope/endoscope inspection probe (something like this: https://amzn.eu/d/ht3vOVE) and slip the end behind the interior trim to explore the backside of the roof panel to check for any wires before drilling. I use one of these and they are invaluable for this kind of application. Of course, you could always call Hillside and ask them to confirm the routing of their wiring loom in your camper.
 
I've looked at the charger in my Birchover today and it is set to position "C" which looking at the instructions is correct for an AGM battery
Apologies I have been slow in reporting back. Revisited the cupboard the other night and also have the internal switch set to position C, so panic over, the charger is all good for now.

I still want to upgrade the VW charging setup to a DC-DC charger though and add a solar panel at some point.

IMG_9887.jpeg
 
Apologies I have been slow in reporting back. Revisited the cupboard the other night and also have the internal switch set to position C, so panic over, the charger is all good for now.

I still want to upgrade the VW charging setup to a DC-DC charger though and add a solar panel at some point.
That’s high up on my list of mods to do once I‘ve taken delivery of my Birchover. At the moment I’m leaning towards a Renogy 200W 12V monocrystalline panel on the roof coupled with a Renogy DCC50 DC-DC / MPPT charger as I think it’ll be an easy swap if, as I understand correctly, there’s an ignition feed near the factory supplied split charger relay under the front seat. However, before actually buying anything, I’d like to actually check out the physical and electrical layout in the van to determine the best way to route the wiring from the PV panels on the roof to the leisure battery location.
 
  • Like
Reactions: Bav
@Captain Quick @DXX
I've managed to speak to someone at Hillside today, and they have stated that there are no looms in that area that should be affected, and that they themselves have not experienced any issues whilst fitting to pre-converted vans, so good news.

Back on the phone to try to get some local quotes for fitting!
 
Work at Hillside in Derby is progressing well with my Birchover campervan. With the SCA pop-top roof installed and the window apertures cut out ‘Bletchley’, as it’s now known, is looking less like a van and much more like a camper…

IMG_1903.jpegIMG_1902.jpeg
 
Last edited:
Looking good Alan - your 2 year wait is nearly over!! When are you picking Bletchley up?
Work at Hillside in Derby is progressing well with my Birchover campervan. With the SCA pop-top roof installed and the window apertures cut out ‘Bletchley’, as it’s now known, is looking less like a van and much more like a camper…
 
Back
Top