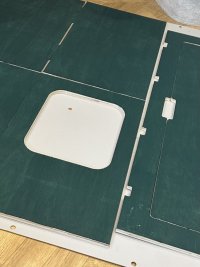
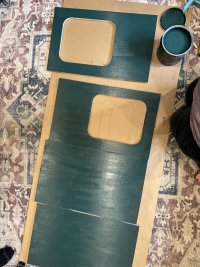
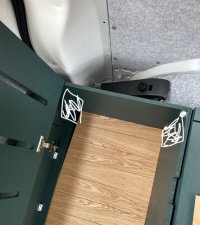
Looks like Nacho is happy surveying the van from his crate!. I've just Osmo'd the bare wood on our Ply Guys. The smell takes a few days to dissipate and it does take a while to dry. Goes quite sticky during the cure process but it's great stuff. I'll be using the rest of the tin on my oak worktop at home afterwards.

loving the B&W bunting. How have you secured that in the van?

Looking forward to furniture progress pics!
 
@TeeCeeJay haha yes Nacho is much more happy when the van isn’t moving to be honest!

So I just did the first coat of osmo, it’s looking really good so far. Pic showing the last bit without osmo for comparison:
IMG_2627.jpeg
I also got a sheet of oak veneer ply from van furniture which I’m hoping to make a worktop from to go along the driver side, as well as a table top for which I’ll get a folding leg etc.

For the bunting I have just used some small pins pushed into the carpet. They have fallen down a couple of times when the pop top goes up/down but I haven’t thought of anything better yet. Maybe could sew it..

Bed frame needs sanding and i think I’ll paint it before putting it together. We’re painting it dark green.
See how far we get over the weekend :cool:
 
@TeeCeeJay haha yes Nacho is much more happy when the van isn’t moving to be honest!

So I just did the first coat of osmo, it’s looking really good so far. Pic showing the last bit without osmo for comparison:
View attachment 206608
I also got a sheet of oak veneer ply from van furniture which I’m hoping to make a worktop from to go along the driver side, as well as a table top for which I’ll get a folding leg etc.

For the bunting I have just used some small pins pushed into the carpet. They have fallen down a couple of times when the pop top goes up/down but I haven’t thought of anything better yet. Maybe could sew it..

Bed frame needs sanding and i think I’ll paint it before putting it together. We’re painting it dark green.
See how far we get over the weekend :cool:
I think velcro will stick to the carpet.
 
A bit disappointed with the floor that seems to be 2 different shades in the 2 parts.
At least it will be mostly under furniture down that side

IMG_2652.jpeg
The smell of the osmo is still so strong. 2 coats applied.
Hope for a few dry hours today so I can leave the doors & windows open to air it out
 
Looks good and great progress. What's the issue with the wheelarch?
Thank you!
At the moment the bed is sitting in between the wheel arches. Preference is for it to be up against one side, so can have storage opposite.
The bed will need chopping up to fit over the wheel arch. It's a bit (a lot) outside of my skill set, and I'm nervous about it losing its structural integrity if I cut it.
I haven't managed to find a youtube video of someone else doing this specifically with the Van Furniture kit to give me an idea where to start.
 
It's not specifically with van furniture kit but Greg Virgoe does a few good videos on you tube about scribing panels to fit awkward van shapes. You could apply his lessons and theories to your kit? I'll try to find links when home tonight.

plenty of practise with cardboard templates before committing blades to your furniture!

Using your side panels would be a good starting place to offer up against the furniture to see what needs cutting.?
Thank you I will do some digging on youtube, and the side panel idea is a great one! Love this forum :D
 
A bit disappointed with the floor that seems to be 2 different shades in the 2 parts.
At least it will be mostly under furniture down that side

View attachment 206718
The smell of the osmo is still so strong. 2 coats applied.
Hope for a few dry hours today so I can leave the doors & windows open to air it out
Looking again at your floor, the grain of the veneer is also going in different directions on the two sections. If you compare the way the grain is 'pointing' you will see one set goes to the front of the van and the other one towards the back. This can make two pieces from the same wood look different shades. It is an effect I used deliberately to make a pattern on a walnut jewellery box that I made. Like you say, good that it will be under the furniture but annoying that it's something that could have been avoided if it was made with a small amount of thought.
 
Formulating a plan for bed butchering..

Cut the corner away from the lid:
IMG_2681.jpeg

Then cut these two lengths shorter
IMG_2683.jpeg

Then move this end panel further in
IMG_2682.jpeg

Then cut the wheel arch shape out of the sliding bench end panels
IMG_2680.jpeg
And afterwards hope it doesn’t collapse when we lay on it :thumbsup:
 
Why are you moving the bed tight against the passenger side and not the drivers side, won’t it get in the way when you get in the van through the side door? Personally I would leave the rear box centralised and just modify the sliding bed part to fit flush against the wall, once you’ve got cushions on the gap between the rear box and side of the van won’t show, looking good though
 
Why are you moving the bed tight against the passenger side and not the drivers side, won’t it get in the way when you get in the van through the side door? Personally I would leave the rear box centralised and just modify the sliding bed part to fit flush against the wall, once you’ve got cushions on the gap between the rear box and side of the van won’t show, looking good though
It only minimally overhangs the side door (lwb). And it means I can use the drivers side for storage.

I hadn’t thought about leaving the rear unit as is, I’ll review my plan - thanks for the idea
 
Pics of the bed as a sofa and then of course as a bed:
IMG_2667.jpeg
IMG_2692.jpeg

Idea is to have a platform/cupboard built for the fridge to go in, battery underneath. And then if camping for longer with the awning up, fridge would be moved to the awning and plugged in to the mobile hook up cable
IMG_2692.jpeg
In the interim it fits under the bed
 
Could you not raise the frame up so it sits over the top of the wheelarch? Great work you have done so far!!
 
Looks great and the difference in floorboards is barely noticeable.
You can put rivnuts in some of those holes along the drivers side and attach your furniture directly to them with bolts or put eye bolts and you can use straps.
 
Back
Top