Reversing Camera - wiring harness route

I love the idea of a switch and using leisure battery for parking mode, but I am uncertain I have that skill.

I am still uncertain if I have the ability to route the wiring also with all the bloomin carpet! Especially seeing how pale the Halfords posse seemed to go faced with the task.

I have reached out to a couple of local auto electricians (doubt will hear anything over festive period) and this job may indeed be too small for them I wonder.
 
@Chris1983
Have a look through this thread

Thread 'Hillside Birchover'
Hillside Birchover

Might give you some more ideas of where you can route your cables.
Plenty of photos throughout the thread.
You can gain access to the rear of the wiring in the back cupboard: 4 screws and the left internal side of the cupboard is removable.
I’d personally go from drivers B pillar along behind cupboards, come out above the rear cupboard.
Hillside wiring takes that route for the leisure wiring.
Others have fitted dash cams to Hillside vehicles. Ask on that thread and you might get some specifics.
 
Bottom left I’d the ‘ cbe’ fuse unit someone mentions above. Is the the best place to draw power do we think?

Would that then not be an awful lot of wiring threaded? Eg from front dash around windscreen around drivers door from b pillar along via spot light void into wardrobe for this fuse box. And then rear camera across rear to other side for the flexi hose thing into the rear tailgate. (Need to consider wiring to reverse light too I presume)
 
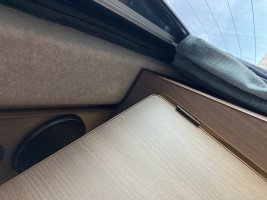
image.jpg

Would I be better rather than trying to navigate tailgate and drilling hole in plastic around rear wiper motor, simply sticking camera here?(I don’t know how to edit and stick a big arrow on rear wardrobe or shelf that goes across whole of rear?
 
If you mount the camera there it will certainly ease the install and give it protection, it will however make it almost useless in rain or roadspray I would think. Possibly if you can engineer it into the centre and it hangs down enough to be in the swept area? Worth temporarily powering up and mounting with tape and then sticking a hose spray on the rear screen to check?
 
Is Fuse 1 (15Amp) the one that feeds your 12v sockets? That would be my choice for taking a feed from as logically that's where you would plug in a non hardwire system - so long as it stays on all the time and doesn't go off with the ignition. Also if you have a fuse go that's not going to cut out either the lights or fridge etc.

You can either make up a Y lead with one spade crimp and two socket crimps or use piggyback connector if there is space.

I'd also put a small fuse (2-5 Amp) inline with the feed to the hardwire kit as you will likely run less than 15 Amp cable.

With visibility from the back you should be able to find a good place to drill for a switch without hitting anything either side - measure it out, maybe make a sketch on paper as a template to be sure, then drill a small pilot hole all the way through. Then you can use a hole saw or spade bit to drill from either side, which should keep the cut into the laminate neat.

Even if you decide doing the DIY is not for you you've identified the access etc for an auto electrician to get to and if you've pulled the wires yourself you've done a good chunk of the basic labour - just make sure they are suitably sized.
 
Thank you. Looks like from within rear wardrobe looking up. The wood is one whole section.

So not sure how I would thread from drivers side spot lights through to that point? Also without drilling big holes?!

I’m going to go and install camera (front) off 12v cig plug in dash, until I can solve this (or pay someone to solve on my behalf)

Cheers again
 
Can I ask also,

When this is all ‘done’….

How it would typically ‘work’. Van gets driven at least every other day.

Power to camera will always be ‘on’. But camera will only ‘switch on’ if vibration noted etc.

Then in future hillside installed solar (maybe) keeps leisure battery ‘topped’ up?

And the switch would essentially be to switch camera power ‘off’ when on campsite/ in storage as an eg?

Again apologies for Luddite q’s
 
My tracker keeps an eye on health of starter battery. I have a BM2 on way to install on leisure to keep an eye on that
 
I realise as well the hard wired power kit for camera is certainly not long enough to make it to rear of van anyhow, so perhaps that scuppers intention anyhow
 
How it would work depends on the camera and the hardwire kit.

First issue is how does it know it is parked? Some hardwire kits have 2 12v leads and you wore one to always live and one to ignition, then the hardwire kit can signal the camera when ignition is off.
If the hardwire kit is single 12v supply then the camera will either use it's shock sensor or GPS to detect when the vehicle has been stationary "enough" to switch to parking mode.

Second issue is how to detect when to record.

On simpler systems it will just monitor the shock sensor and wake up and record for a fixed time afterwards - simple but means that you often will not have footage of the impact just the aftermath.

On more advanced systems the camera stays active but doesn't record to the SDCard but just buffers a few seconds in memory endlessly. It can then use the shock sensor and/or do movement detection on the video and start recording but, crucially, it can record the few seconds video it has buffered as well so you have much more chance of seeing a few seconds before the trigger.
The downside in the advanced systems is greater expense and usually more power draw (as it's essentially on all the time just not recording to save SDCard space) and for that reason the more advanced ones tend to offer a choice of parking modes.

An alternative technique is that the camera just drops to a low frame rate and records a time lapse. That saves storage space and avoids any need for a trigger but obviously means it's on all the time and can miss potential crucial evidence in the gaps between frames.
 
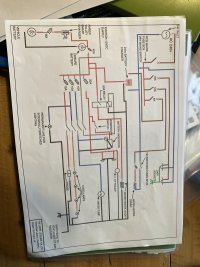
The wiring diagram explains what the big relay is for then, your 12v water heater :thumbsup:

So from the documents you'd want to tap off Fuse 4 - just keep in mind if you make a Y cable the arm that needs connect the 12v socket needs to be similar sized cable to that installed as that's fused to 20A and, theoretically, a 12v socket can handle 15A in short loads. I'd be tempted to see if a piggy back connector would fit on the back of the 12v socket connection, these type of connectors. So you'd crimp the wire to the camera into one of these (one for 12v and one for ground) take the existing wires off the socket's spade terminals, put these on the socket spade terminals and then put the existing wiring on to the spade terminal on the piggy back connector. I'd grab some connectors and do a dry run before crimping everything to make sure there is space and nothing ends up under strain.

bdc887d1300fb3dc-394091129.jpg

I wouldn't expect the hardwire kit to be long enough, you'd extend a 2 core wire back along the same run you are putting the camera cable in and then join it to the hardwire kit somewhere suitable up front. A set of crimped spade connectors would be an ideal join in case you change camera or the hardwire kit fails.

If space is really tight you only have to get a 12v cable in as you could use a ground point near the front if needed, just if you are pulling things and a 2 core will fit it saves you having to find a route to a ground point elsewhere, see what works best for you.

And yes any future solar install will keep the leisure battery topped up. You will see from the BM2 what the "idle" rate of charge/discharge is, you may find that solar provides enough power to keep the camera running in parking mode even in winter in which case you might decide to leave it running in case of incidents wherever you store your van - if you do that you'll probably want a larger SDCard as it might be longer than usual until you visit the van and realise you need to check the footage and most cameras loop around and record over old footage when they run out of space.
 
Back
Top