You are using an out of date browser. It may not display this or other websites correctly.
You should upgrade or use an alternative browser.
You should upgrade or use an alternative browser.
Solar Panel no controller
- Thread starter secretK9agent
- Start date
-
- Tags
- solar
Victron Orion XS 12/12-50A DC-DC Battery Charger (700W)
Victron's latest DC-DC converter, with additional adaptive charging capabilities. Suitable for stepping down 12V to 12V at a maximum output of 50A
Is this the correct one?
How would I house in drivers seat base? Need drilling through?
What wire would I need?
Many thanks,
I’ve made a pact with myself (with your kid support) if I can sort the DRL bodge myself and save £££, I will throw that at Dc to Dc and Ablemail
Seems fair
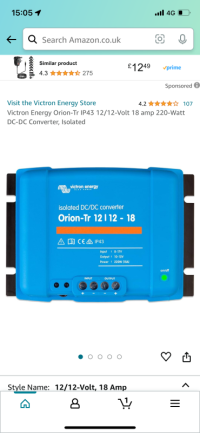
That’s the new and expensive one. Good if you want the best. Cheaper option is the Orion 12 12 18 isolated:Victron Orion XS 12/12-50A DC-DC Battery Charger (700W)
Victron's latest DC-DC converter, with additional adaptive charging capabilities. Suitable for stepping down 12V to 12V at a maximum output of 50Amidsummerenergy.co.uk
Is this the correct one?
How would I house in drivers seat base? Need drilling through?
What wire would I need?
Many thanks,
I’ve made a pact with myself (with your kid support) if I can sort the DRL bodge myself and save £££, I will throw that at Dc to Dc and Ablemail
Seems fair

That’s a nicer price
I got my Ablemail from here: Simply Split Charge
Good service and great price.
These are great cable cutters:

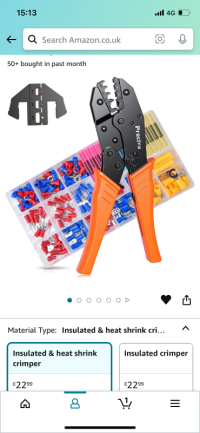
And these are good crimpers that will do the connectors that come with the Ablemail and others in the future. Also has some connectors to practice with.

With the Orion the only crimping you will need to do are the insulated connectors that come with the Ablemail. Everything else is bare cable that can be stripped carefully with a Stanley knife.
Good service and great price.
These are great cable cutters:

And these are good crimpers that will do the connectors that come with the Ablemail and others in the future. Also has some connectors to practice with.

With the Orion the only crimping you will need to do are the insulated connectors that come with the Ablemail. Everything else is bare cable that can be stripped carefully with a Stanley knife.
For your first electrics project I'd stick to the lower power option that @ginkster suggests.
The Orion XS is 50A capable so all cabling, crimping and needs to be pretty heavy duty.
Depending on the slack you have in the cables feeding your SCR you may be able to crop the relay holder off and connect them directly to the Orion. In which case you only really need to add an equivalent guage wire from the two negatives on the Orion to the ground bolt under the carpet. And you might be able to repurpose a premade battery lead for those:
If you are buying crimpers make sure they come with jaws for both heat shrink (DRL) and normal (Ablemail) crimps as the shapes required are slight different
The Orion XS is 50A capable so all cabling, crimping and needs to be pretty heavy duty.
Depending on the slack you have in the cables feeding your SCR you may be able to crop the relay holder off and connect them directly to the Orion. In which case you only really need to add an equivalent guage wire from the two negatives on the Orion to the ground bolt under the carpet. And you might be able to repurpose a premade battery lead for those:
Pre-Made Battery Leads | 12 Volt Planet
Pre-made battery leads for connecting batteries in parallel or series, or for making connections from battery terminals to other equipment.
www.12voltplanet.co.uk
If you are buying crimpers make sure they come with jaws for both heat shrink (DRL) and normal (Ablemail) crimps as the shapes required are slight different
The one I showed above from Amazon does both.If you are buying crimpers make sure they come with jaws for both heat shrink (DRL) and normal (Ablemail) crimps as the shapes required are slight different
I have these, would they suffice?
Bought for solar install that was a similar hand hold job
I have these, would they suffice?
That's a nice set Paul, and currently 5% voucher too, excuse me just off to Amazon...
(Damn the forum - it overlaps some of my existing crimpers but at that price it's worth it for the ones I don't have)
(Damn the forum - it overlaps some of my existing crimpers but at that price it's worth it for the ones I don't have)
Oh and I do have these, purely for cutting and stripping, they'll strip 10mm² at a push.
I have these, would they suffice?
That looks a good set. I had to buy another couple to cover other connectors.This is the set I have, comes with 5 different jaw sets for insulated, uninsulated, ferrules etc.
View attachment 248241
OrderedThis is the set I have, comes with 5 different jaw sets for insulated, uninsulated, ferrules etc.
View attachment 248241
Something like this in red and black for the ATM to DC-DC:
3mm2 PVC Cable
And 2 of these at an appropriate length for the Orion neg to chassis (you’ll cut one end off to go in the Orion):
10mm2 battery leads
Keep the AMT close to the Orion to minimise cable length. If you want to have the ability to turn it off/on you can put a simple switch (>3A capable) in the supply cable (LB pos to AMT cable) to allow this. Useful for maintenance or managing what’s charging what and when.
Similar threads
- Replies
- 13
- Views
- 620
- Replies
- 8
- Views
- 685
- Replies
- 10
- Views
- 518
- Replies
- 13
- Views
- 864


