I am from Australia
You are using an out of date browser. It may not display this or other websites correctly.
You should upgrade or use an alternative browser.
You should upgrade or use an alternative browser.
T6 OEM LED-headlight retrofit
Ha, bit far that is
StuFish
Member
Hi all, I was wondering if anyone has any experience with the aftermarket LED units by Camper Glass, Chillijamvans or Vanstyle? Seeing them on EBay for £385-£495, advertised as plug and play, but concerned about the levelling etc? At those prices they seem a great deal, any advice would be appreciated, cheers Stuart
Hi all, I was wondering if anyone has any experience with the aftermarket LED units by Camper Glass, Chillijamvans or Vanstyle? Seeing them on EBay for £385-£495, advertised as plug and play, but concerned about the levelling etc? At those prices they seem a great deal, any advice would be appreciated, cheers Stuart
They are not LED headlights, they just have LED DRLs. They are halogen, but some offer them with LED replacement bulbs, which is quite different to LED headlights.
Many of us have fitted them and they are very good with the right bulbs/LEDs/HIDs in them. Do a search and you'll find an 80 odd page thread all about them.
StuFish
Member
Thank you and makes sense with the cheap price! CheersThey are not LED headlights, they just have LED DRLs. They are halogen, but some offer them with LED replacement bulbs, which is quite different to LED headlights.
Many of us have fitted them and they are very good with the right bulbs/LEDs/HIDs in them. Do a search and you'll find an 80 odd page thread all about them.
Hi mates,
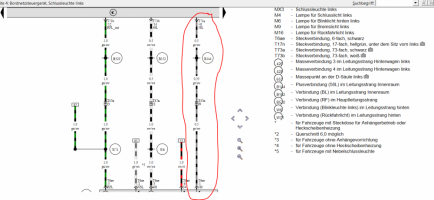
I also retrofitted LED Headlights on my T6. All light are working ok, but I am getting this permanent error with parking lights:
Does anybody know what could be wrong? In electric instalation i just moved pins for parking lights from BCM connector A to pins 5,6 in plug B.
Thanks
Regards
Jaro
I also retrofitted LED Headlights on my T6. All light are working ok, but I am getting this permanent error with parking lights:
Code:
Address 09: Cent. Elect. (J519)       Labels:. 7E0-937-BCM-V1.clb
   Part No SW: 7E0 937 090 C    HW: 7E0 937 090 C
   Component: BCM PQ25 Max4 H82 0752
   Revision: B9082001    Serial number: 4000 280170214
   Coding: 62A8393A0A212013002809746C2B8CD5C010738960CD7960330400230800
   Shop #: WSC 27272 072 90300
   VCID: 2B02F105D30B4C430A1-807E

   Subsystem 1 - Part No SW: 7E0 959 801 M    HW: 7E0 959 801 M
   Component: J386__TSG_FT  003 0653
   Serial number: KU0KU028091772710976
   Coding: 0400A0

   Subsystem 2 - Part No SW: 7E0 959 802 M    HW: 7E0 959 802 M
   Component: J387__TSG_BT  003 0653
   Serial number: KU0KU029091772721666
   Coding: 1400A0

   Subsystem 3 - Part No SW: 7E0 959 442 A    HW: 7E0 959 442 A  Labels: 3C8-959-537.CLB
   Component: E221__MFL-DC1  H02 0103
   Serial number: 46170000750220117121
   Coding: B4FFFF

3 Faults Found:
03431 - Activation of Left Parking Light
            011 - Open Circuit
             Freeze Frame:
                    Fault Status: 01101011
                    Fault Priority: 2
                    Fault Frequency: 1
                    Reset counter: 0
                    Mileage: 36157 km
                    Time Indication: 0
                    Date: 2021.06.14
                    Time: 21:47:35

03432 - Activation of Right Parking Light
            011 - Open Circuit
             Freeze Frame:
                    Fault Status: 01101011
                    Fault Priority: 2
                    Fault Frequency: 1
                    Reset counter: 0
                    Mileage: 36157 km
                    Time Indication: 0
                    Date: 2021.06.14
                    Time: 21:47:35

04194 - Vehicle Status with Under-Voltage
            002 - Lower Limit Exceeded
             Freeze Frame:
                    Fault Status: 01100010
                    Fault Priority: 3
                    Fault Frequency: 1
                    Reset counter: 0
                    Mileage: 36157 km
                    Time Indication: 0
                    Date: 2021.06.14
                    Time: 21:47:35
Does anybody know what could be wrong? In electric instalation i just moved pins for parking lights from BCM connector A to pins 5,6 in plug B.
Thanks
Regards
Jaro
I retrofitted my LED tail lights, too. I just changed the wires in the connector and added extra wire from left light to the right. Tail lights are working ok, too. I did the same operation on my older T6 and there were no problems.. But there I retrofitted only tail LED lights... No LED headlights in the front.
Yes.... tail lights are not working ok. Thank you for the tip. PWM signal wire is necessary or not? I could use it for 2 extra wires for led lights in the front.Tail lights stay as they were originally.
New feed is for front LEDs only.
Last edited:
Hi all, had a good read through the thread and feeling confident enough to do this myself with the info and help provided! It will be a 16 plate Caravelle I’m doing this to once it arrives. Have pm’d Pauly to see if he still makes looms which would be a bit of a timesaver.
However - what is the most advisable place to pick up big ticket items such as the headlights? Searching for the Valeo numbers on eBay comes up with a few new hits just shy of the £600 mark. Are these a good option? They are stated as Valeo brand - is buying the like this the same as buying them as the VW PNs? I’m sure I saw a site on a google hit for the Valeo number mention ‘without motors for headlight adjustment’ or similar.
I’ve also seen some new power modules for what seems like a sensible price. Am I correct in that the OEM DRL units are Delphi and the beam units are Mitsubishi? There are some non-brand main beam units which I will stay away from.
TIA - the first of many questions!
Last edited:
Can’t seem to see the button to edit my post a second time, but just found the site again which makes reference to no levelling motors for the Valeo units. Is this a red herring or is it the case that it is a difference between the Valeo and OEM VW units.
Additionally, on eBay at least it seems more headlights with the 7E2941036 /035 part numbers. Looking at the stickers these are indeed RHD units (7E2 vs 7E1 LHD lamps). These 035/036 are the parts list on page 9 parts list for LHD but not RHD, are these a suitable part or should I be strictly looking for 773/774 only?
Additionally, on eBay at least it seems more headlights with the 7E2941036 /035 part numbers. Looking at the stickers these are indeed RHD units (7E2 vs 7E1 LHD lamps). These 035/036 are the parts list on page 9 parts list for LHD but not RHD, are these a suitable part or should I be strictly looking for 773/774 only?
Last edited:
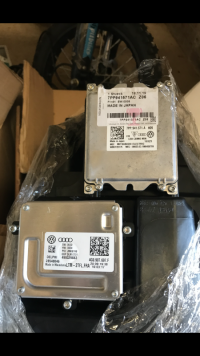
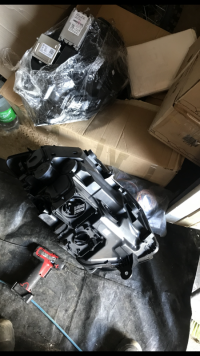
I bought my lights from TPS with motors (they don’t come with the LED driver modules 2 req for each headlight as you know if you have read through the thread with 14x fixing screws), for around that price.
Avoid buying the driver modules from eBay UNLESS you can easily send them back as they have had issues with them (even new units failing) so you want some sort of protection to allow exchanging them if they fail.
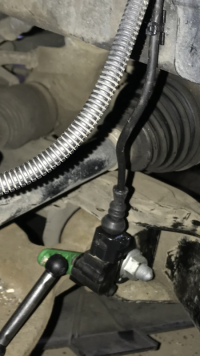
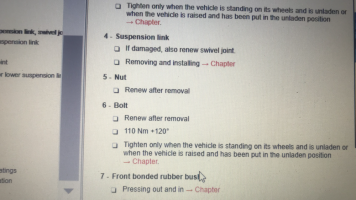
Replace the front suspension nut and bolt which needs to be removed to fit the sensor bracket as it is torque to yield. Think it was 1st stage 110Nm, second stage 120 degree torque angle but I would need to check ELSA (workshop manual).
I made my own looms on the van, but Pauly’s one will save lots of time.
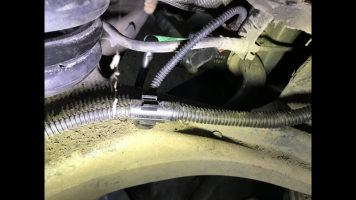
I did the sensors first and ran the two 3 core 0,5mm looms to the drivers footwell.
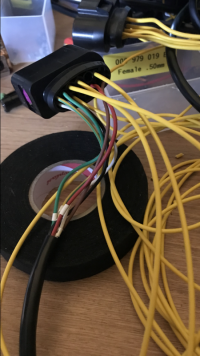
The 0.5mm 6 core loom from MX1 left headlight was run down the side of the battery using the existing body clips and into the cabin from a small grommet accessed by easing the carpet and sound deadening out the way.
Make a SMALL round hole in the removed grommet (rather than slicing with a blade) and pass the core through, this keeps the grommet tight to the core without splitting.
Use a rod from the cabin to the engine bay (I have a super rod kit, but an open coat hanger would do) tape the 6 core to the rod and ease into the cabin then pass the core to the drivers side footwell keeping it above the pedal box housing (follow large loom right at the top and down behind J519 bracket so it does not get caught in the pedal mechanisms.
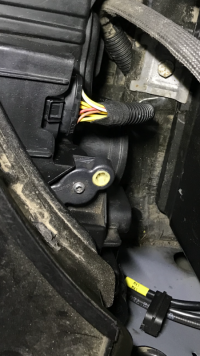
MX2 right headlight loom and the front sensor loom follows the original loom around the air filter housing and in through the large rubber gland which needs to be pulled forward to allow cutting two nipples to run the 6 core through one and 3 core sensor loom through the other. Make the cut at 90 degrees to avoid splitting and allowing smells and noise into the cabin. Take time to refit the block correctly into the bulkhead, be patient it will go in. Once you have done a few it is much easier, the first time will be a PITA and you will get frustrated. Use brake cleaner to make it slippy (but dries tight) to ease the process. Same when running cores through grommets.
If you use Pauly’s loom I’m not sure what route he suggests, but I made up mine to look original for the rear and ran the 3 core into the right rear quarter and used an inspection camera to find it as the van I did last weekend was fitted with a conversion with insulation so difficult to get to it in comparison to a panel van.
Then ran it up to the factory loom in the roof and along to the drivers A pillar and down to meet the other cores.
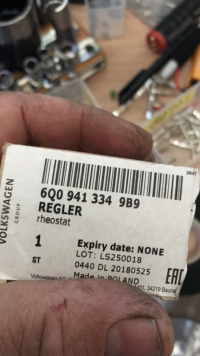
You should also remove the range rheostat and fit just the dash one to keep it original.
Look at the images to help picture some of the above.
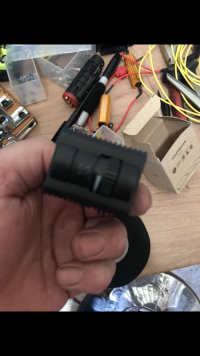
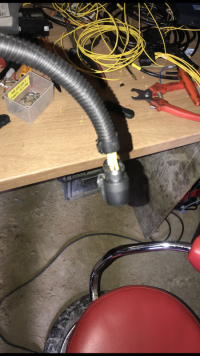


Last edited:
Press the three dots at the bottom of your post to get edit function, remember to save afterwardsCan’t seem to see the button to edit my post a second time, but just found the site again which makes reference to no levelling motors for the Valeo units. Is this a red herring or is it the case that it is a difference between the Valeo and OEM VW units.
Additionally, on eBay at least it seems more headlights with the 7E2941036 /035 part numbers. Looking at the stickers these are indeed RHD units (7E2 vs 7E1 LHD lamps). These 035/036 are the parts list on page 9 parts list for LHD but not RHD, are these a suitable part or should I be strictly looking for 773/774 only?

Thanks for the comprehensive post. TPS prices reasonably competitive in that case it would seem? I’ll need to give them a shout on Monday and get their pricing as a baseline. Everything new would be nice if not astronomical, and at least as you say you get warranty on the parts. Given I was tempted to go the Hazzydayz route, if I can DIY it which I’m happy enough with, and get the parts and vcds in at £1500-2000 I’d be delighted.I bought my lights from TPS with motors (they don’t come with the LED driver modules 2 req for each headlight as you know if you have read through the thread with 14x fixing screws), for around that price.
Avoid buying the drivers modules from eBay UNLESS you can easily send them back as they have had issues with them (even new units failing) so you want some sort of protection to allow exchanging them if they fail.
Replace the front suspension nut and bolt which needs to be removed to fit the sensor bracket as it is torque to yield. Think it was 1st stage 110Nm, second stage 120 degree torque angle but I would need to check ELSA (workshop manual).
I made my own looms on the van, but Pauly’s one will save lots of time.
I did the sensors first and ran the two 3 core 0,5mm looms to the drivers footwell.
The 0.5mm 6 core loom from MX1 left headlight was run down the side of the battery using the existing body clips and into the cabin from a small grommet accessed by easing the carpet and sound deadening out the way. Make a SMALL round hole in the removed grommet (rather than slicing with a blade) and pass the core through, this keeps the grommet tight to the core without splitting.
Use a rod from the cabin to the engine bay (I have super rods bit an open coat hanger would do) tape the 6 core to the rod and ease into the cabin then pass the core to the drivers side footwell keeping it above the pedal box housing (follow large loom right at the top and down behind J519 bracket so it does not get caught in the pedal mechanisms.
MX2 right headlight loom and the front sensor loom follows the original loom around the air filter housing and in through the large rubber gland which needs to be pulled forward to allow cutting two nipples to run the 6 core through one and 3 core sensor loom through the other. Make the cut at 90 degrees to avoid splitting and allowing smells and noise into the cabin. Take time to refit the block correctly into the bulkhead, be patient it will go in. Once you have done a few it is much easier, the first time will be a PITA and you will get frustrated. Use brake cleaner to make it slippy (but dries tight) to ease the process. Same when running cores through grommets.
If you use Pauly’s loom I’m not sure what route he suggests, but I made up mine to look original for the rear and ran the 3 core into the right rear quarter and used an inspection camera to find it as the van I did last weekend was fitted with a conversion with insulation so difficult to get to it in comparison to a panel van. Then ran it up to the factory loom in the roof and along to the drivers A pillar and down to meet the other cores.
You should also remove the range rheostat and fit just the dash one to keep it original.
Look at the images to help picture some of the above.
View attachment 120316
View attachment 120317
View attachment 120318
View attachment 120319
View attachment 120320
View attachment 120321
View attachment 120322
View attachment 120323
View attachment 120324
View attachment 120325
View attachment 120327
View attachment 120328
View attachment 120329
View attachment 120330
View attachment 120331
I’m a fair bit away from looking to run any cables and the likes, but it’ll no doubt be one of these things that is much clearer once in amongst it. Do you make the looms up to sell also? I would offer you the job of the retrofit, but you’re the opposite end of the UK (I’m Aberdeen). I’ve already sent Pauly a pm so will see if he is still offering them first and foremost. I do like things to be as OEM as possible, but certainly piggybacking where possible always makes life easier!
Edit - on the edit front, I think the option disappears after what must be 1hr or so!
The retail price may be a bit more, so do check prior to pulling the trigger. I am all for saving money doing these things, but sometimes it costs more in time when things don’t work out the box or something is missing, which can be frustrating and expensive if you don’t have some comeback from your supplier. Sometimes paying a bit more is better in the long run.Thanks for the comprehensive post. TPS prices reasonably competitive in that case it would seem? I’ll need to give them a shout on Monday and get their pricing as a baseline. Everything new would be nice if not astronomical, and at least as you say you get warranty on the parts. Given I was tempted to go the Hazzydayz route, if I can DIY it which I’m happy enough with, and get the parts and vcds in at £1500-2000 I’d be delighted.
I’m a fair bit away from looking to run any cables and the likes, but it’ll no doubt be one of these things that is much clearer once in amongst it. Do you make the looms up to sell also? I would offer you the job of the retrofit, but you’re the opposite end of the UK (I’m Aberdeen). I’ve already sent Pauly a pm so will see if he is still offering them first and foremost. I do like things to be as OEM as possible, but certainly piggybacking where possible always makes life easier!
Edit - on the edit front, I think the option disappears after what must be 1hr or so!
I haven’t made a loom to sell yet. I have to get the 0.5mm 6 core imported from abroad as can’t find a supplier in the UK doing 0.5mm 6 core, and 0.75 mm is too large to fit in the range adjuster ecu plug nicely. I only use the pins fitted to the end of the wire rather than making splices so it is an end to end single wire unless a junction is needed when I fit a genuine sealed VW (AMP or Tyco) type housings."
Lovely part of the world, but too far to come at a sensible price.
I used @Robert and @mmi threads for coding as reading the posts it seems everyone gets caught out with something after the retrofit, me included for the first few (not that I am anything special anyone can do this with time and patience).
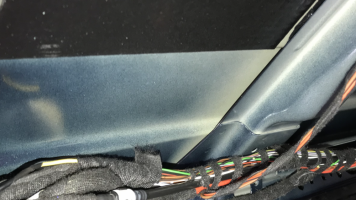
For the additional fog and reverse (if fitting the T6.1 rear LED lights) I picked up the feeds from the left roof loom see image.
Some other images added which may help visualise the fit.
Take the opportunity to charge the battery during the fit if doing it for someone else.



Notice the negative charger lead is the body side of the shunt (word 61 battery manager) so it can work out the input charge. Normally this would be on a separate earth point, but the leads were too short. If you put it on the battery post, the input current is not factored into the ecu. Deffo don’t jump start here as the ecu can blow.
For the additional fog and reverse (if fitting the T6.1 rear LED lights) I picked up the feeds from the left roof loom see image.
Some other images added which may help visualise the fit.
Take the opportunity to charge the battery during the fit if doing it for someone else.


Notice the negative charger lead is the body side of the shunt (word 61 battery manager) so it can work out the input charge. Normally this would be on a separate earth point, but the leads were too short. If you put it on the battery post, the input current is not factored into the ecu. Deffo don’t jump start here as the ecu can blow.
Similar threads
- Replies
- 5
- Views
- 2K

