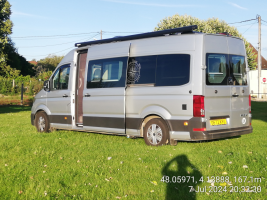
Toddy's Crafter Build

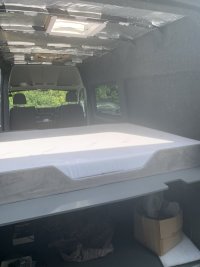
Quiet day in the office today, so more progress with the crafter :) & delighted to finally cover the bed bulkhead with velour/faux suede. It’s finished with knock on trim & means the carbon pultrusion (as I've some kicking about) bed slats can now be partially installed.

Next up, the side bench seat/mini double.

IMG_1841.jpeg

IMG_1837.jpeg
 
Last edited:
Bellypan fitted today - M8 rivnuts fit directly into the pre existing chassis holes x5 & the rest was m6 panel fixing clips. Easy job to smash out in 30 mins.

IMG_1916.jpeg
 
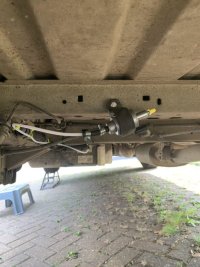
Whilst she’s up on ramps, I’ve tapped into the diesel tank, part run the fuel line & fitted the pump. The connector kit (Eberspacher Kit 292180010370) is great as you just snip off the spare feed nipple, deburr, confirm flow & press the fitting in place - so much easier than the T6 standpipe fitting hassle.

Just be sure to check for flow as the nipple has three tiers and I have to remove the second to achieve flow.

IMG_1915.jpeg

IMG_1917.jpeg
 
Another day on the van, so:-

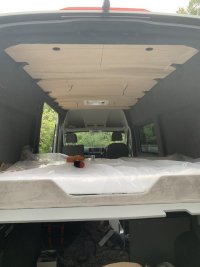
The roof panels are finally fitted - made from 5mm ply (scribed in) & fixed with 25mm c’snk tech screws for a flush finish - just need to decide on the trim.

Then the nippers bed has been built - it’s 15mm ply, finished with carpet/ velour plus Ali extrusion corners. Just need the hinge so it opens to give access to the whopping 1.5x0.6x0.5m storage!

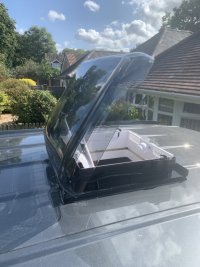
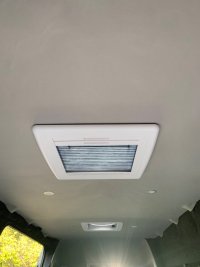
Finally the rear skylight (Maaxfan) is fitted - doesn’t really fit the depth of roof I have, but I can refinish it to make good.

Overall i’m delighted so far as at 6ft2, I’ve still got an inch headroom when walking about or 5 when sitting on the bed ;)

IMG_1926.jpeg

IMG_1928.jpeg

IMG_1929.jpeg

IMG_1954.jpeg
 
Last edited:
Rear blinds fitted also & a rather inexpensive solution to use Schottis from IKEA @ £5ea.
I will need to join 2 for the side windows and magnets will keep them up, but so far so good.

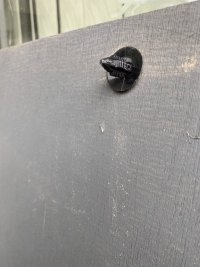
Panels are coved with stretch suede & pressed into the doors with Christmas tree plugs. I just drilled the boards to 12mm & the door to 7mm

IMG_2171.jpeg

IMG_2170.jpeg

IMG_2184.jpeg
 
Last edited:
Last edited:
Given that my MH has just gone back to the dealer for a week. The driver who collected it messaged me when him got back to the dealership and informed me that the cab heater is only blowing cold air. So I may not actually get it back.
Maybe I will do another Crafter/MAN build ;)
 
Given that my MH has just gone back to the dealer for a week. The driver who collected it messaged me when him got back to the dealership and informed me that the cab heater is only blowing cold air. So I may not actually get it back.
Maybe I will do another Crafter/MAN build ;)
Please?!!
 
  • Like
Reactions: Eli
Great build thread but it would be nice to see it copied onto the Crafter & TGE Forum.

By the way having looked at your first page I hope someone has pointed out that a Crafter does not have a DSG gearbox. However the torque converter auto is also great.

1726259105169.png
 
Finally a sunny day in the New Forest, so it was time to finish installing the Maxx skylight! - As its not really designed to fit the crafter roof, a little permanent viynl was required to cover the small gap between unit & cowling. But despite that creating solution, she's fitted & I'm very happy with the finish!

Next job was to start the kitchen unit build & so far I've cut the ply, the Alu corner extrusions & next up is the carbon fibre surface cladding as I don't fancy suede getting wet when the slider is open! I'll post some more images when its complete as juggling a few jobs for the time being.

skylight.jpg

carbon.jpg
 
Too late for you now but I hope you were aware that there is someone on the Crafter and TGE FB page that supplies a moulding to fit Maxxfan to Crafter roofs.
 
Too late for you now but I hope you were aware that there is someone on the Crafter and TGE FB page that supplies a moulding to fit Maxxfan to Crafter roofs.
Seen a few of the spacers of eBay, but didn’t see the point shelling out when I’ve the tools & interest to DIY. But I’ll head to the FB page as always up for picking up tips.
 
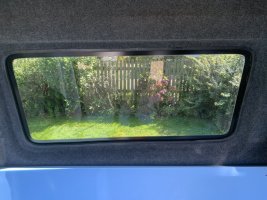
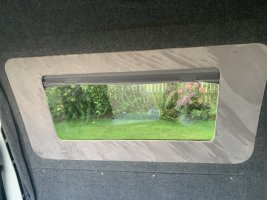
Driver side window blinds made & fitted with a finish I’m happy with. As will most things I’d rather DIY that buy OTS because the challenge is half the fun for me personally.

The 3D printer has been getting some work on this one as a result & Swedish meatballs for lunch was an added bonus of needing to pop to IKEA again for the SCHOTTIS blinds.

IMG_2252.jpeg

IMG_2259.jpeg

IMG_2256.jpeg

IMG_2253.jpeg

IMG_2260.jpeg

IMG_2262.jpeg

IMG_2264.jpeg

IMG_2265.jpeg
 
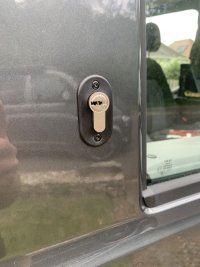
Today’s job was to finish installing the hook locks on the front doors. As I noted before, it’s a job that’s easy to mess up & that would be a very expensive one indeed. Very much a case of measure twice & cut slowly.

My method is as follows:

1) mask up paintwork.
2) measure from door top down with giant right angle.
3) measure from door lock up with 30cm rule.
4) cross check a slot lenght.
5) measure door inner out.
6) offset slot width.
7) 115mm slitting disk long wides.
8) 30mm dreamt cut off tops.
9) remove tang & debut.
10) check slot fit with lock mechanism.
11) offset barrel from TE of door.
12) drill2mm & check centre line.
13) open up to 18mm, mark jetway & drill lower home to 10mm. Slot with seemed.
14) deburr & rush treat.
15) fit mechanism & batter, screw in place.
16) check lock function!!!
17) mark up for for rivets, then drill.
18) rust treat then rivet.

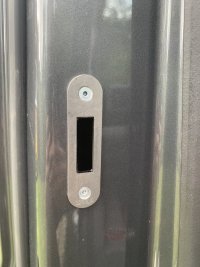
To ensure the striker plate is correctly placed.

1) mask area for striker.
2) paint end of lock mech, shut door & strive.
3) place striker & mark up.
4) cut slot with dremal & debut.
5) rust treat & tape plate to door
6) check lock function!!!! Adjust if needed
7) mark off, drill & affix rivets.
8) Pour yourself a single malt, the stressful job is finished!!

IMG_2276.jpeg

IMG_2278.jpeg

IMG_2277.jpeg

IMG_2281.jpeg

IMG_2279.jpeg

IMG_2280.jpeg
 
Last edited:
With a THQ delivery of smoked carpet plus high temp adhesive in the bag & my 3D printers last pass on the remaining custom mounting brackets complete, i’m finally able to finish off the slider door trim as shown below.
It was a case of:
1) Scribing in & plugging the panel gaps with 5mm ply.
2) Edge trimming with ‘U’ sectional (15x3) rubber that’s pre-stuck in place with MMA (ZapGap & kicker).
3) carpeting all over, having removed the slam brackets & slackened the latch handle.
4) trial fitted the custom mount brackets & marked the centres with ‘marksman’ (As @truebluetravellers John would say - it’s a “cracking bit of kit for the workshop”!)
5) then simple press home the custom van shade & admire the finish!

Next up is the A) rear wheel carrier (wheeliams) painting & fitment, B) Truma heater wiring in & C) kitchen unit build before the Crafters first wild camp out. But in the mean time it’s seems only right to have a break in the T6 to Stonehenge.

IMG_2315.jpeg

IMG_2323.png

IMG_2302.jpeg

5EABF578-4E32-4E42-9305-11822551ECF4.jpeg

IMG_2309.jpeg
 
Back
Top