If they are the same Renogy 100W as mine, they are 22.5V (open circuit) and 18.9 V optimal operating. The listing title is 12v but I think that’s a bit misleading.I would measure the output voltage under decent sun before you connect them up - 12v seems low compared to other panels.
Pete
ToddiesT6 - Build Log
- Thread starter ToddiesT6
- Start date
-
- Tags
- build thread.
Yeah, I chopped the original MC4 connectors off and replaced with new ones crimped on. I just bought a pack of the inners though. Reused the plastic plug parts.
Clear details & instructions seam to be a weak point with Renogy - but I’ll keep an eye out once installed & thanks for the info.If they are the same Renogy 100W as mine, they are 22.5V (open circuit) and 18.9 V optimal operating. The listing title is 12v but I think that’s a bit misleading.
Yup, not happy with that then as despite Renogy showing ‘series’ as an option - the MPPT fired up over voltage warnings as soon as the sun came up this morning!
All covered up & disconnected with Y connects on route to allow a ‘parallel’ install - everyday remains a school day.
All covered up & disconnected with Y connects on route to allow a ‘parallel’ install - everyday remains a school day.
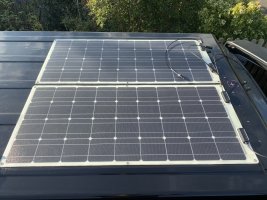
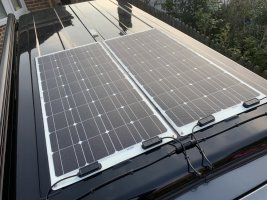
So the ‘Y’ connectors turned up just now, I’ve connected the cells in ‘parallel’ & (other than ‘low tac’ masking tape sticking like sh*t to a blanket when it comes to the poptop) it all seams to be working fine despite my ‘series’ connection error.
Cables to be clipped in place when the rain stops! So yep, still learning & isn’t VanLife brilliant
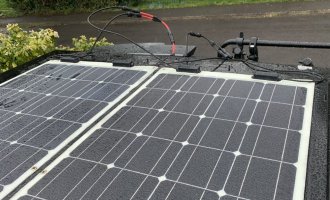

Cables to be clipped in place when the rain stops! So yep, still learning & isn’t VanLife brilliant


Not sure TBH as these state they are less effected by shade than ‘other’ brands due some new internal structure, but it’s all black magic to me……so time will tell.Wouldn't parallel be better anyway? In case one is shaded the other won't be affected, so I seem to recall?
Nice job btw.
Another week away with business, then a bit of cable tidying & finally Solar is up &running The initial teething & charging concerns were down to one simple fact - my need to calibrate the Renogy battery monitor! Yep 118Ah/74% was actually 170Ah/100% when I measured the volts under charge & figured out that it was already maxed out.
LED’s on for hours & hours finally dropped the charge by 5% & despite an overcast morning, the battery was back to 100% in no time.
Now you might wonder why I didn’t connect the 2000w inverter I have with a hair drying to drain it down? Well that was the plan till another surprise (& expense) appeared as the inverter instructions confirms it requires a second battery to run ….yep that’s £675 worth of ouch for today day at school campervan
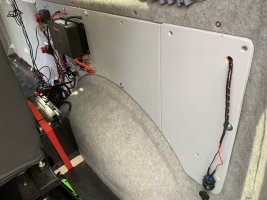


This week I’ve mostly been building camper units (with photos to follow once complete) but I’ve also cleaned up the ‘parallel’ solar cable install to my satisfaction after the ‘series’ install error.
Ok so I’ve now got 2x boxes & the ‘Scanstrut’ units are much more expensive than standard gland boxes, but looks tidy & the height remains below 2m

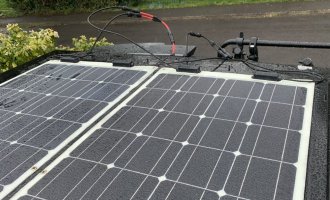
Ok so I’ve now got 2x boxes & the ‘Scanstrut’ units are much more expensive than standard gland boxes, but looks tidy & the height remains below 2m


Last edited:
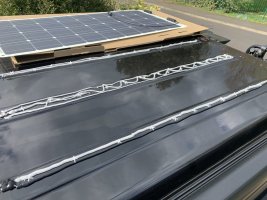
So looking at your fixing, you have just applied sikaflex to the raised sections of your roof with tile spacers to prevent it compressing too far? Have you sealed it along the front or is there a gap underneath the panels from front to back? I need to install one when I get my roof fitted so looking at how best to do it!So that’s the cells installed, basic functional checks complete & now I just need some sunshine in the morning to validate a few final things.
View attachment 197163
View attachment 197164
View attachment 197168
Vinyl strips down first to protect gel coat, then sika 252 atop with bond gap (tile) spacers every 200mm along the roof ridges. Nothing extra on the leading edge as I want to help air flow below them (help keep panels cool) and also water drainage.So looking at your fixing, you have just applied sikaflex to the raised sections of your roof with tile spacers to prevent it compressing too far? Have you sealed it along the front or is there a gap underneath the panels from front to back? I need to install one when I get my roof fitted so looking at how best to do it!
I am personally happy with sika 252 & prep undertaken. but many prefer mechanical fixings also.
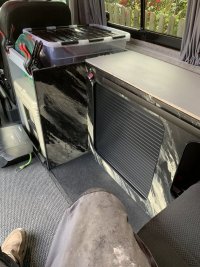
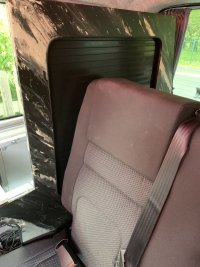
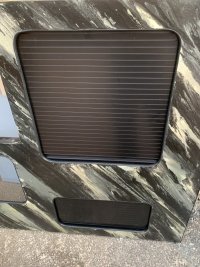
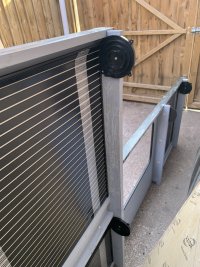
So as mentioned I’ve been building my own units with help from ‘the nipper’ - Simple enough design, but personalised with an acrylic poured finish….which might not be everyone’s cup of earl grey, but it certainly is mine.
Construction is from 12mm hard ply, jigsaw cut & T-slot routed edges prior to a half coat of PVA (to seal) & then 2 coats of cupboard internal carcass grey (as the base). The acrylic pour finish is PVA/water/pigment & silicon (for the bubble effect) before being given 3 coats of PU satin varnish to finish.
Tambour doors, black anodised table rail & T knock on edge profile complete the side panel with the final opening being a hinged solid panel that’s yet to be fitted.
Can’t wait to upload images of the fully installed units, but for now it’s a collection of images that I hope give you the idea. And ‘Yes it’s taking a lot of time’ but it’s great doing something with the nipper that we are both enjoying.
Cost wise it’s around £400 all in - which is what your average MDF rubbish would cost - so have a go & personalise your own van maybe ?


Last edited:
MattsT619!
Member
Hi. I’m a bit of a novice tbh but I want to use the f45s 3 m awning on my LWB with pop top. Same as yours. Did you use the fiamma f45s brackets and use an m6 riv nut into the gutter to replace the original thread under the pop top hinge ?A pre booked day off & despite the rain, I’ve got the awnings installed
Alas because of the pop top, I’ve had to create a new rearward fixing point with (yep you guessed it) a ‘Rivnut’ & silicon seal. Unfortunately it’s double skinned in the gully, so I couldn’t add the extra washer as planned, but I’m happy enough with the M6 plus sika 252 alone.
Next step was repositioning the ‘through bracket to awning’ bolts (Rivnuts again) & that’s it done.
View attachment 195748
View attachment 195749
View attachment 195750
View attachment 195751
View attachment 195752
View attachment 195753
Thanks.
Yes - because the original fixing points are taken up by the poptop, there was no rear fixing left to take the awning. Removing the poptop brackets, fixing the awning ones and shimming it all was for to much risk so I popped in a new rivnut & positioned it as desired. It’s also sika 252’ed into position (critical step) so is going nowhere.Hi. I’m a bit of a novice tbh but I want to use the f45s 3 m awning on my LWB with pop top. Same as yours. Did you use the fiamma f45s brackets and use an m6 riv nut into the gutter to replace the original thread under the pop top hinge ?
Thanks.
MattsT619!
Member
Yes - because the original fixing points are taken up by the poptop, there was no rear fixing left to take the awning. Removing the poptop brackets, fixing the awning ones and shimming it all was for to much risk so I popped in a new rivnut & positioned it as desired. It’s also sika 252’ed into position (critical step) so is going nowherm
MattsT619!
Member
Most people cut the bracket down (cut off the gutter section) and then riv nut to the body work. However I like the idea of a new gutter mount using a riv nut. What size riv nut did you use please ?
Thanks.
Thanks.

