We have the 112 RIB which is fixed. The sleeping space between the unit and the opposite wall is just over 120cm. The units are evomotion, and come out approx 42cm to the worktop overhang, the fridge does stick out slightly further. We decided to go low level to reduce the claustrophobic feel of taller units.


IMG_0477.jpeg
 
I haven't watched the video but this guy seems to have built a normal 3/4 but with the storage at the side at the right height so it adds to the bed space. Maybe an option and the best of both worlds? I'd add some high level storage above.

1000007319.png
 
I think a rib bed is higher than a rock n roll bed and the Vanmax pop top has reduced head height. So fitting a rib on rails so it’s 30mm higher might leave you unable to sit without your head hitting the roof.
 
I haven't watched the video but this guy seems to have built a normal 3/4 but with the storage at the side at the right height so it adds to the bed space. Maybe an option and the best of both worlds? I'd add some high level storage above.

View attachment 275343
Yes I've seen that . UAO Aiden.

That Aluminum floor is nuts.
 
I think a rib bed is higher than a rock n roll bed and the Vanmax pop top has reduced head height. So fitting a rib on rails so it’s 30mm higher might leave you unable to sit without your head hitting the roof.
I’ll measure my Reimo next time I’m at the van. However, the height from seat surface to ceiling is set by the height of the wheelarch and the thickness of the seat. The floor is higher, but I guess it has shorter legs than a seat not on rails.

Mine was an interference fit with the wheelarch when they fitted it…
 
Fortunately for me in this scenario I’m not especially tall, and I have a fairly high roof - other combinations of roof to head height might be different!
 
Interesting, I suggested to my better half that I could cut down the units at the side of our RIB bed to give extra sleeping area for most of the bed length, but she wasn't impressed.

I recall that UAO Aiden installed a Mobiframe RIB type bed that has a thinner seat cushion to save on the height of the seat, When the backrest is folded down it has a thin mattress part that folds over the flipped seat cushion to equalise the height. Quite nifty really.
 
I thought it was about time i added the other RUUVI temp sensors, to the Cerbo GX-S in the Bus, - - Here -

i already had one for the LB battery temps

1740210735982.png

...

This now gives me remote monitoring of all the Temp data for the Bus on one place.


1740210759511.png

1740210769791.png

.
 
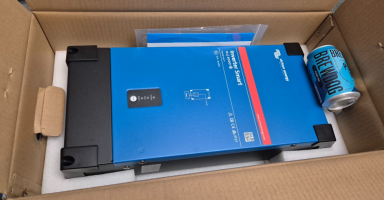
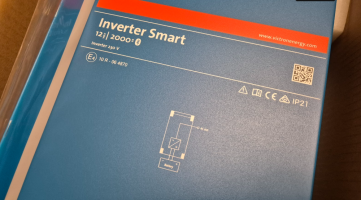
Finally decided which way to go with the 240v side in the Bus.

Yep - I'm going Team Blue.


no the next problem is - where to fit in?

12v side needs to be as short as possible, and battery is installed under the drivers seat.

and i think its too big to fit under the passenger seat (without making a box around it)

...


1740211865761.png1740211878743.png1740211895615.png

1740211879075.png

1740211895957.png
 
We had a Very Productive day yesterday . . . . we had the first bit of sun I've seen for what seems like months,

and no rain or work. So i had a rummage through the pile of upgrades that has been amassing since the end of last season.

...

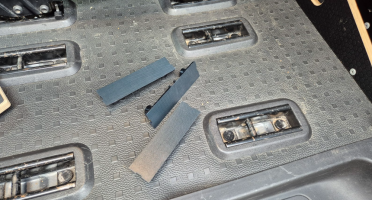
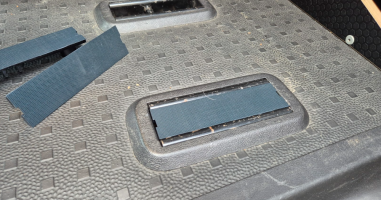
Kombi seat bracket blanks.

if you know, you know . . . and those floor brackets are very ouchie on your feet and knees when staying out in the van.


1740297592309.png


they just clip in and save your knees and toes . . . . they work well, but a bit pricey for what they are.

1740297648421.png


.
 
  • Like
Reactions: CAB
OVANO seat base rear covers.


we see these at Busfest and liked the look of them,

they match our OVANO bed system, and cover the holes in the seat, the drivers base has a battery in, and the passenger base has the EHU stuff - that we dont use anyway.

so the Blanking panels seemed like a good option to tidy up the area.


they can be screwed on from inside the seat base. . .

but i decided to try out Velcro for now. . . these are semi permanent and will come out again,

and with the Velcro its easy to pop then and get to the bits under the seat. . .


1740297974104.png1740297989831.png1740298011232.png


.
 
Rear Bumper protector,


our bumper is colour coded and already had marks and scratches on it.

adding a protection strip seemed like a no -brainer.


1740298189878.png


this is a VAN-X version, that covers most of the bumper,

it comes with 4 3M strips pre attached.

the tricky part was keeping the trim where i wanted it as i peeled the tape.

1740298279598.png


but it worked out fine in the end.

1740298301267.png


the final look . . . much better, and the black goes well with the grey.

1740298322820.png


.
 
Dryrobe fluffy seat covers.

i always have seat covers on,

and my preferred ones are the OEM Black Sportline ones,

1740298518661.png


i already had one of the grey Dryrobe seat covers that a got from a T6F member the other year. .

and i like to fit them over the winter months when its wet and cold.

they are nice and fluffy and waterproof - apparently.

anyway, they feel nice. and i keep them on till the weather gets better, normally the start of summer or late spring.


so i finally got around to getting a second one to make a matching pair.


1740298713907.png


not much to see, they are one piece with velcro airbag slits which are great if you have arm rests.

the just wrap around with a few velco fasteners.


.
 
  • Like
Reactions: CAB
Dash Top Cover.

the T6 Dash top pocket is just stupid - who thought that was a good idea?

any thing i put in there reflects on the windscreen,

and then i just turns into a junk dump ground,

and as such i just throw a black "beer mat" over the lot to stop the reflections etc. - said beer matt also doubles as a great screen wipe & duster

the "Chief Advisor" however was no so happy with my great idea.

on no . . . . .

she has seen the VW Comfort dash in some T6 magazines i had laying about. - with the super fancy dash pocket covers and cooler bit for your drinks bottle.

well im not paying for a new dash !!

so this THQ dash top cover seemed to fit the bill.

old trim out. . . .

1740299173060.png


new trim in. . .

1740299214029.png


well . . . . .

in and out about 20 times as i wasn't happy with the fitment.

in the end i gave up with the fitting guide and just done my own thing. - no clips and two screws.

1740299280414.png


final result . . . well, i suppose it does look better than a beer matt?

1740299332733.png

.


after all that the "Chief Advisor" come out for an inspection. . . .

"Is that it?",
"why don't it stay up by its self?",
"you've not fitted it right"
"why don't the colour match"

Jeez - some people are never happy.


.
 
Footwell Lights


I've got these on the VAN and love them,

so thought it was about time it fitted these,

i had the TravelinLite set, that are 3colour - you can select RED/BLUE/WHITE.

i decided on white for now.

the come ON/OFF with the curtsy lights, so when you lock/unlock, open door etc.


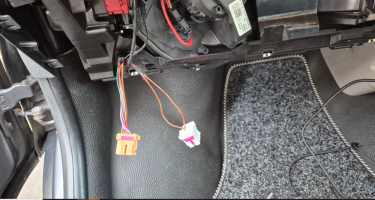
clip off both lower covers,

remove the glove box, remembering to not unplug the yellow airbag switch


1740299696475.png

to locate the white plug with two wires,
the kit come with two wire-taps.


1740299797707.png

carfully cut out he light blanks with a utility knife.

1740299833427.png1740299847836.png


and clip the light in. - the switch on the back is for the colour selection.

1740299863612.png


nice,

1740299890227.png


then just reassemble jonny 5.


+++++


1740299999535.png


.
 
Reposition WIFI stick


weve had the WIFI stick in the glovebox for over a year - and it works fine.

but will drop signal sometimes when way out in the country,

so i though i would place it higher up and have a better chance at getting some signal.

i already had powered USB cables at the top of the screen, (and in the glove box)

...

so it was just a case of using my favourite tempory sticky stuff - Velcro.

1740300201374.png

1740300219644.png


nice,

1740300236795.png


not sure how it will hold up in mid summer . . . so well see.
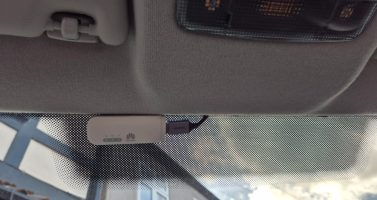

FYI my wifi stick in the VAN, is in a similar location, but tucked in behind the headlining - and its been there for years with no issues.

.


.
 
  • Like
Reactions: CAB
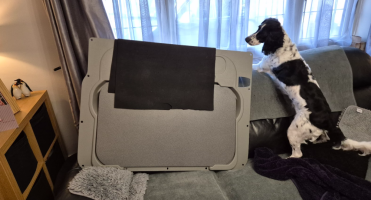
LOC8 - Table


weve had this in the living room for two years now.

(purchased from a T6F member couple of years ago, and collected from Busfest via the Forum courier service - Thanks Andy)

as my plan was to carpet it. . . .

well that hasnt happened yet.

so i though, lets lit it, and take it back out when its time to carpet it - if that every happens.


1740300455017.png


fitting was simple enough,

use a decent trim tool to pop out 6 million trim-clips from the existing panel.

1740300524972.png


then replace with the new panel,

i had to play about with the insulation in the door as you need space for the pockets.

but it went on fine.

1740300555509.png


+

1740300624206.png


.
 
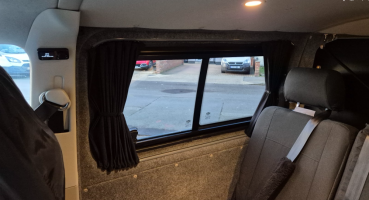
Premium Blackout Curtains - Black


we already had the Grey curtains kit from Kiravans.

and bought this whole van set from a forum member. - as they were the up rated Premium set.

well it turn out that, as i thought all these kits are the same, same rails, same fixings etc etc etc.


1740300861638.png


so we just left the rails in place and swapped the curtains.


1740300915363.png


ultimately we are going for VANSHADES, but until then the curtains work fine.


.
 
Back
Top