Toddy's Crafter Build

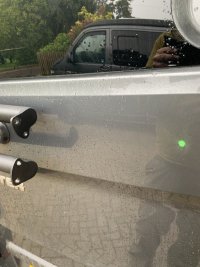
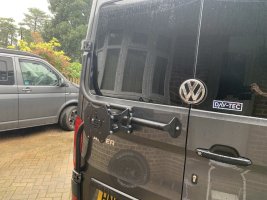
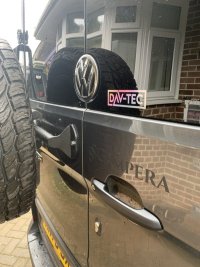
The joys of funemployment means I've more time to work on the crafter, so today I installed the Wheeliams spare wheel carrier.

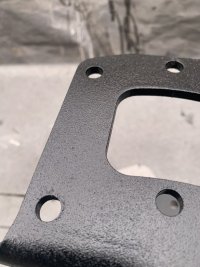
1) Prep metal parts & paint.
2) Remove inner panels to access back of doors.
3) Switch magnetic stops from NS to OS & refit.
4) Support rear door
5) Remove upper bolts with breaker bar, hang upper beam & bolt back up, but don’t forget the rubber section that’s mean to stop damage.
6) Repeat for lower beam.
7) Fit middle beam (finger tight) & mark up hole.
8) Remove middle beam.
9) place pot inside door to catch swarf.
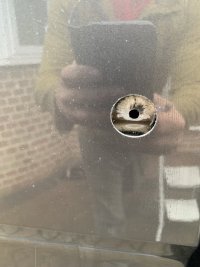
10) Pilot drill at 2mm, them hole saw to 25mm BUT only through the outer skin!
11) Open through hole to 8.5mm & deburr all.
12) Rust treat bare metal.
13) Sika EBT+ hole & insert nylon washer.
14) Sika mounting foot on mid beam.
15) Refit mid beam & the 8 bolts - don’t forget the mid beam is biased to the NS.
16) Place mounting plate & 6 bolts.
17) Copper slip 5x whee nut holes & hang wheel!

Like most people I agree this should really have a male bolt sticking out so you have something to locate the wheel on when mounting. But if you balance it on your knee & rest on the bumper, it’s not to bad.
IMG_2334.jpeg

IMG_2345.jpeg

IMG_2346.jpeg

IMG_2347.jpeg

IMG_2348.jpeg

IMG_2349.jpeg

IMG_2354.jpeg
 
Another day, more job applications in the bank. Then on to building my carbon fibre cladding for the kitchen.

Having most of the composite bits (or alternatives) needed to hand, makes vacuum consolidation of the surface layer to the panel so much easier.

A quick polish up & you can start to image the finished product - albeit a way off yet.

IMG_2372.jpeg

IMG_2373.jpeg

IMG_2375.jpeg
 
So today’s seen a bit more of the kitchen unit fitted, but I can’t progress much further until the fridge is delivered! The drawers will be mounted in the coming days & then I’ll cut the final face sheet to fit.

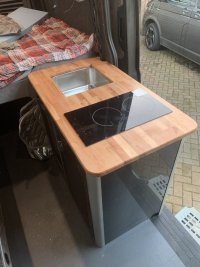
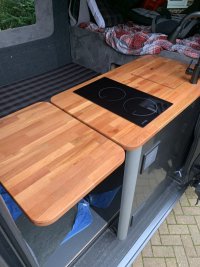
Sink fits in ok, a bit of nibbling for the induction hob & I’ve the work top to make also (end grain balsa wrapped in GRP as it looks like butcher block but weighs only 2kg for the entire 1100x600x45 slab)

IMG_2382.jpeg

IMG_2387.jpeg
 
Last edited:
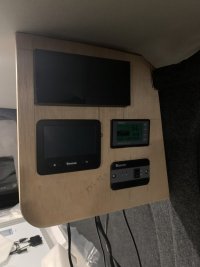
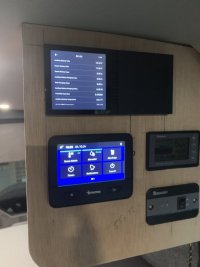
With the kitchen unit progressed, I’ve also been able to temporary mount the control panels in positing & start getting the systems working.

Apart from 1 leak where the John Guest speedfit pipe goes to the Truma frost valve (alignment isn’t great, the run is short & 12mm isn’t that forgiving) I’ve hand no leaks - so I’ll swap to flexi & try again. Just need to do a bit of instruction reading tonight, then tomorrow it’s time to power up the Truma.

Oh and the solar panels arrived - so need to MacGyver a bracket & then it’s go time.

IMG_2386.jpeg

IMG_2385.jpeg
 
Last edited:
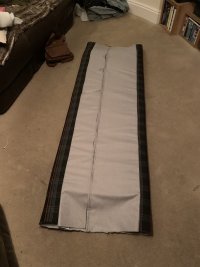
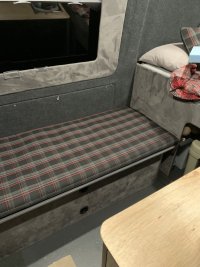
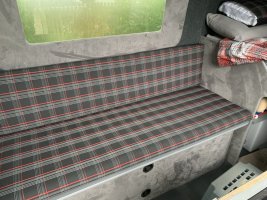
Today I’m identifying as a seamstress in order to hop on the old sewing machine! Now I’m not particularly great at this task, but £250 savings for bench cushions helped inspire me to have a go.

So far, I’m happy with the look - just need to buy some more thread to finish them off

IMG_2442.jpeg

IMG_2443.jpeg

IMG_2444.jpeg

IMG_2446.jpeg
 
Last edited:
Bit of work on the kitchen today with the 85l Apicool fridge finally arriving & now fitted.

I alsp cut the panel hole for the tambour door & under sink storage, leaving just enough time pocket out the worktops & trial fit the sink/induction hob.

It’s all getting 5 coat waxed finish, so be good & waterproof once I purchased some more beeswax.

IMG_2485.jpeg

IMG_2483.jpeg

IMG_2484.jpeg
 
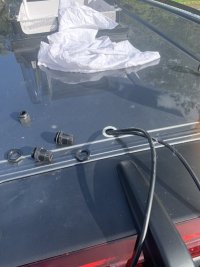
And I’m on a roll as the stealth roof rack gets fitted today!

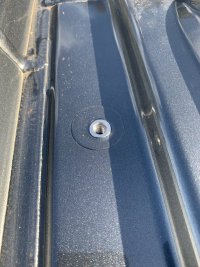
1) Erwin rails (3m) drilled & countersunk (m6x25)
2) plastic roof covers cut out
3) m6 rivnut (long shank) installed (you could through bolt if no headliner)
4) Alcohol wiped & adhesive primer applied.
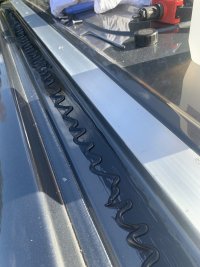
5) EBT+ along the rail line & around holes.
6) consolidated into place.
7) Don’t forget to add silicon to the bolts threads to fully seal the threads.

And that’s the ‘rack’ fitted - not bad for £70 and you can’t even see it from the ground :)

IMG_2494.jpeg

IMG_2497.jpeg

IMG_2498.jpeg
 
  • Like
Reactions: CAB
With rails installed, I’ve used butterfly Erwin fixings to mount the solar panel - thankfully the pre drilled panel holes fitted perfectly!

1) Install butterfly bolts & lock down with nut.
2) add another nut & lock to panel (on ground) via a third nut.
3) lift into position & screw down.

I’d recommend 50mm long butterfly bolts or longer as it’s very closed to the roof!

Finally I’ve fished the solar cables from the rear factory hole. Added a grommet to prevent chaffing & the usual grommeted entree cover.

Just need to affix the cable to the roof - another Amazon order for some p clips tonight then.

But that aside, I now have solar - so the 85l apicool can be flicked on.

IMG_2499.jpeg

IMG_2500.jpeg

IMG_2504.jpeg

IMG_2503.jpeg
 
With rails installed, I’ve used butterfly Erwin fixings to mount the solar panel - thankfully the pre drilled panel holes fitted perfectly!

1) Install butterfly bolts & lock down with nut.
2) add another nut & lock to panel (on ground) via a third nut.
3) lift into position & screw down.

I’d recommend 50mm long butterfly bolts or longer as it’s very closed to the roof!

Finally I’ve fished the solar cables from the rear factory hole. Added a grommet to prevent chaffing & the usual grommeted entree cover.

Just need to affix the cable to the roof - another Amazon order for some p clips tonight then.

But that aside, I now have solar - so the 85l apicool can be flicked on.

View attachment 263073

View attachment 263074

View attachment 263075

View attachment 263076
Did you consider Unistrut?

I've no idea about these things, but saw someone else using it.
 
Did you consider Unistrut?

I've no idea about these things, but saw someone else using it.
Yep looked at unistrut but it stands proud, needs painting and it much heavier - the Erwin rail is anodised, lighter & sits within the gutters - you can’t see any rail from the ground - I’m pleased as punch with it!
 
  • Like
Reactions: CAB
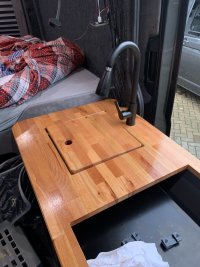
Temu for the lightweight tap! Albeit I might regret my choice in time, but let’s see how it fairs.

Seating (sewing) finished till I build another van & very happy with the results as the pattern lines up!

And a chopping board to fill in the sink when not is use - just need to drop it down 8mm to make flush.

IMG_2527.jpeg

IMG_2528.jpeg

IMG_2516.jpeg
 
Another Temu delivery (hinges) & the flip up is fitted which was just in time for another outing.

Fitting the kayak inside and through the hatch went to plan - almost like I’d measured twice and cut once.

Loving the crafter - but it won’t be long till she’s finished & then what am I meant to do?

IMG_2587.jpeg

996c6ba9-4267-4319-9589-96e6e8a74bdc.jpeg

IMG_2574.jpeg
 
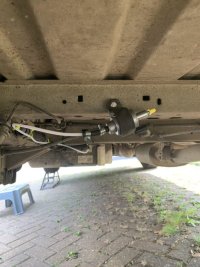
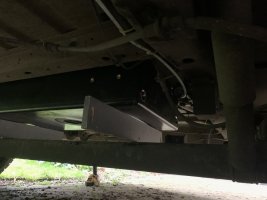
Every days a school day & today it’s time to relocate the truma diesel pump so I can fit the 40l waste tank.

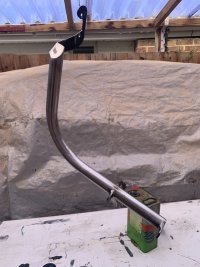
Simple enough & next up, making the waste tank mounting brackets -£25 for 40x3x2500 flat stock stainless, versus £100 for off the shelve units.

IMG_1915.jpeg

IMG_2631.jpeg

IMG_2633.jpeg
 
Did you do the Fresh water yet? What size was/is it?
 
Back
Top