T6 LWB T30 140 Acapulco blue - Build Thread

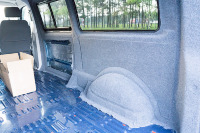
Also carpeted and fitted my Kiravans door store using hidden clips. Turned out quite good.

Excuse the dents in my door, not sure how I'm going to sort that yet

View attachment 8563
The easiest way to sort that @xpfloyd is to fit Vanshades :whistle::whistle::D. Look on the Forum at some of the side doors that have had them fitted. Good luck, sir :thumbsup::thumbsup:. You might need to fit a strip of linking carpet from behind the Kiravans storage to under the Vanshade frame.
 
Last edited:
@Granny Would you mind posting a photo of the vanshade pod that is on your slider? I am trying to work out if the pod will hide the dents in my door below my window. I suspect they are too low though

I think you should just filler the dents, prime with a spay can and the use a colour matched can and laquer.. Then if you still need to a small carpet section.. Or instead of a blue can, use a dark grey, might then not need carpet?
 
I think you should just filler the dents, prime with a spay can and the use a colour matched can and laquer.. Then if you still need to a small carpet section.. Or instead of a blue can, use a dark grey, might then not need carpet?
I thought of just filling and spraying but didn't think I could get a can of the correct colour? I bought a scratch repair tin but it's absolutely tiny and not a spray
 
Try a gray that matches the carpet?

Halfords or better still your local automotive paint factors for a mixed and matched rattle can..
 
Just make sure he hasn't been on the lash! I'll be up that way myself at some point, visiting the gf's mum..
 
Just make sure he hasn't been on the lash! I'll be up that way myself at some point, visiting the gf's mum
Just realised I'm being an idiot, my mate owns a spray shop in Glasgow and will be able to mix me some up. Not sure why I didn't think of that earlier! Doh


Not sure it's worth using a pin puller on them, as you might not get to the back to correct the paint burn.. See what he reckons..
 
Bit of a photo heavy update of the work carried out yesterday and today laying the floor -

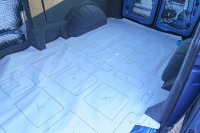
First of all I made a paper template of the floor and marked on where the ribs were -

34890093746_b0dedf465c_h.jpgVWT6.jpg by VW T6, on Flickr

34930733075_56adc6c3fb_h.jpgVWT6-2.jpg by VW T6, on Flickr

I then cut out where the ribs were and overlaid that onto the 9mm floor that came with the van and marked it up -

34798895251_9d6a9c5ba7_h.jpgVWT6-3.jpg by VW T6, on Flickr

34798900931_f39ca3e683_h.jpgVWT6-5.jpg by VW T6, on Flickr

34798904111_cd2475b8f7_h.jpgVWT6-6.jpg by VW T6, on Flickr

I then used the 9mm floor to draw the outline on the 12mm ply and cut it out -

34798908031_e6a2e77bab_h.jpgVWT6-7.jpg by VW T6, on Flickr

Then I overlaid the 9mm floor and marked up on the 12mm floor where the ribs were so that I would know where to put the screws -

34930746415_2498cc1972_h.jpgVWT6-8.jpg by VW T6, on Flickr

Next I bonded the 9mm floor down with sikaflex and left it over night. This morning I used up the remaining silentcoat I had and added a layer of bubble foil insulation (a last minute decision!)

34766866952_da8e2d0c01_h.jpgVWT6-9.jpg by VW T6, on Flickr

34766876062_70175acc32_h.jpgVWT6-11.jpg by VW T6, on Flickr

34798924461_32b89eb388_h.jpgVWT6-13.jpg by VW T6, on Flickr
 
Last edited:
I then screwed the 12mm floor down using the markings I had put on earlier to ensure I hit the bonded wood with the screws -

34890143076_aea48eb407_h.jpgVWT6-15.jpg by VW T6, on Flickr

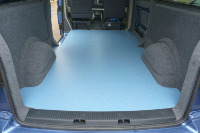
Finally I laid the Altro (I had used the 12mm floor as a template before I screwed it down) and installed the new rear and side trims including the Kombi step light -

34890146456_2232c179e5_h.jpgVWT6-16.jpg by VW T6, on Flickr

34087715094_78c3e5727f_h.jpgVWT6-17.jpg by VW T6, on Flickr

34087718144_cd6f140b21_h.jpgVWT6-18.jpg by VW T6, on Flickr
 
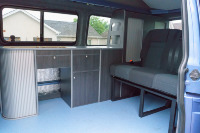
@xpfloyd Awesome work this weekend and a very nice job with simple yet clear explanation to go with superb photos :thumbsup:. Furniture and rib test fit looks great and gives a very professional and polished finish to your conversion :cool:
 
The trial fit of the furniture and the RIB has made me realise I dont want Vanshades. I had previously decided I wanted them (as I really like them) but wanted to wait and see how much of the rear side window can be seen by the rear passengers. Turns out quite a lot of it. If I get Vanshades I either need to panel over that window and just have a vanshade pod on the slider behind the driver or I could install a pod on both windows but the rear one would be a PITA to open and close as I would have to reach through the tall wardrobe each time. So I think I am just going to get standard blackout curtains
 
@xpfloyd but won't you have the same problem closing a curtain on that window. Why not just black vinyl that window behind the units and use a curtain for the rest with vanhades for all others. Vanshades are a better option and I would try to find an alternative for that window as I've suggested as you don't want the contents of your shelves and wardrobe to be on view to the outside world.
 
Last edited:
Back
Top