Fogstar Drift 12v 230Ah Seatbase battery -- "How I Done It" --

Thanks for all the replies.
Im currently planning my electrics layout. It doesnt look like the Fogstar is going to work for me as I have a factory swivel seat. I also need to think about where to put the inverter. I am thinking it wont go under a seat, so it looks like the battery (and all associated gubbins) will have to go near the offside wheel arch so the inverter can go near to it. (I think I need to start a dedicated thread).
 
+1 on the rubber edging. In fact @Soundz it was from reading your post that I bought some before doing my install.

I purchased mine from


Gen 3 Install. Have changed it slightly since the 1st photo. Main supply cable after the mega fuse now goes to an isolator under the front of the seat before routing to the drivers seat in conduit , rather than going straight out.

Also made a mock up of the battery which really helped, but mine was only made from cereal boxes!!

Added conduit anywhere where I thought any contact might possibly occur.

Battery is right up against the rear of the seat base (against the rubber edging) and held down at the rear by a full width wooden baton with a foam strip on the underside. At the front it’s held nice and snug by another shaped and angled bracket going across the front of the battery to the front of the seat upon which the mega fuse is secured.

Working out how to move and secure all the OEM connectors, relays and fuses is what took the most time.View attachment 223093View attachment 223094View attachment 223095
Crownfield Lithium Iron phosphate cornflakes guaranteed to give you a buzz in the morning :rolleyes:

I probably stole the edging idea here, so no kudos for me, mind it's nice being a tiny cog in a wheel of help;)
 
Thanks for all the replies.
Im currently planning my electrics layout. It doesnt look like the Fogstar is going to work for me as I have a factory swivel seat. I also need to think about where to put the inverter. I am thinking it wont go under a seat, so it looks like the battery (and all associated gubbins) will have to go near the offside wheel arch so the inverter can go near to it. (I think I need to start a dedicated thread).
guess that's inverter dependent? It is doable with some models there also a B2B neg bus smart shunt inside...and the 12V DC supplies outside,so they are really easy to trouble shoot............unlike the seat bases

52170566094_6a7186bfea_b.jpg_S2I2305 by Stuart Philpott, on Flickr
 
1703331383386.png


❄️ Enjoy our Winter Sale discounts ❄️


10% off LiFePO4 Fogstar Drift and Solar batteries
Keep your off-grid adventures going with longer-lasting energy. Use code WINTERDRIFT at the checkout.

20% off Cylindrical batteries, chargers, and accessories
Power your everyday devices and electronics – without breaking the bank. Use code WINTERSALE23 at the checkout.

Our Winter Sale will be live until Tuesday 2nd January 2024*.

Please note:
We'll be taking a festive break from Friday December 22nd until Tuesday January 2nd. Orders placed during this time will be shipped upon our return on January 2nd 2024.​
 
Just dealing with the first full discharge test. . .

BMS low pack voltage cutoff is supposed to be 10v.

looks like we got down to that and the battery shut down.

1705076074426.png

.


1705076250647.png

this morning i had a low SoC warning come up . . .


1705076473056.png


the BMS showed 0% SoC way before the battery shut down . .

1705076389144.png


and the Victron shunt was showing 238Ah capacity and still going. . .

1705076540879.png


.

++++++++


so thats all good - test passed.


++++
 
  • Like
Reactions: CAB
Full Re-Charge Test. . .


I have the Renogy 50A DC-DC charger in the van . . .

which has a Lifepo4 wake up feature . . . . which is good.

because the battery has shut down, some dc-dc chargers will not not start-up as they cant detect the battery. . . (a safety feature of pre lifepo4 days )


the only way to get these chargers started is to Jump the battery, ie finding some way of getting voltage across the battery terminal, for the dc-dc charger to detect, which will allow it to start up.. (ie a jump starter pack or jump leads (but use a incandescent test probe or light bulb as a current limiting device ) - https://amzn.to/41UA65c


1705081842777.png

...


not so for the Renogy and Victron chargers ,. . . we don't need to do that, just switch on and off we go.


they allow a low current charge voltage at the terminals which a sleeping lifepo4 battery will use to start charging the battery. . . until which point it will wake up and allow full charge rate. .


..

either that - or remove the battery and bench charge it. . .


+++

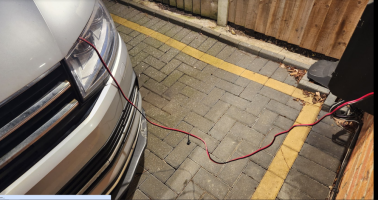
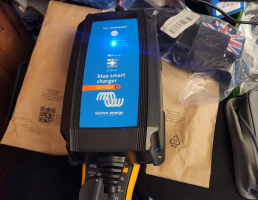
for for this test ill use a Victron IP65 charger conected to the van with a quick disconect cable, attached to the starter battery.

with the charger set to AGM High profile, this will charge the starter battery.

1705077007124.png


well loose a volt over the cable, so the starter battery will see 14.6v and charge nicely. . .

1705077056554.png

1705077138899.png

.

the Renogy DC-DC charger will see the raised start battery voltage and wake-up. .

and then start putting out power to the FOGSTAR battery . . . which should wake it up.


which it did. . .

1705077366946.png


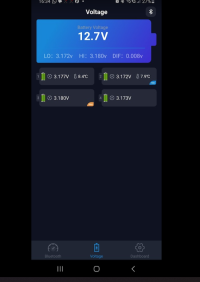
the battery wakes up as expected . . .

1705077386564.png


the APP come back up. . .

and shows 13A of the 17A thats goind to the starter battery - being used to charge the DRIFT.

1705077438682.png

here are some of the status pages. . .


1705077465891.png1705077477167.png

.

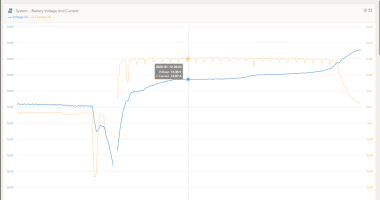
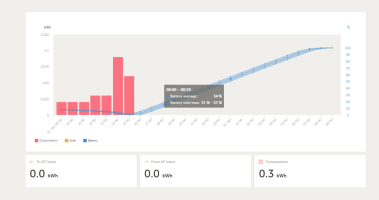
all confirmed by the Victron Shunt and Cerbo remote monitoring. . .

1705077531930.png
.


TBC . . .


.
 
Last edited:
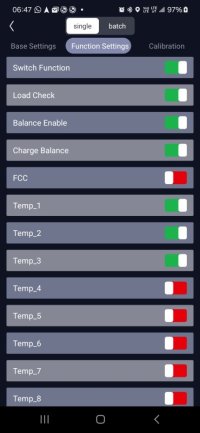
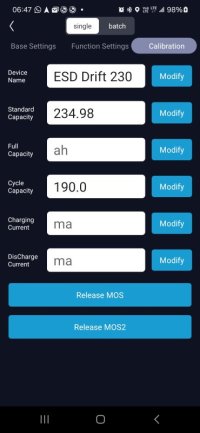
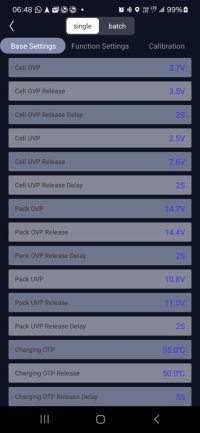
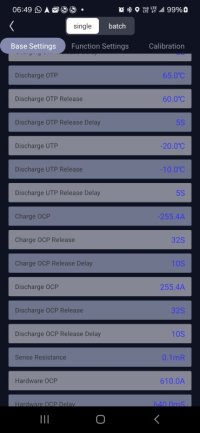
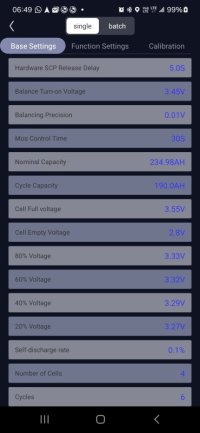
For those that are wondering what the Fogstar BMS programming looks like.....

DO NOT TOUCH THE BMS PROGRAMING, ITS A SAFTEY FEATURE !!!! And invalidates the warranty.


(unless you really, really know what you're doing)

Didn't see a mention of the heater, so assuming it's a stand alone module.

...
Screenshot_20240118_064707_Fogstar Drift.jpgScreenshot_20240118_064725_Fogstar Drift.jpgScreenshot_20240118_064733_Fogstar Drift.jpgScreenshot_20240118_064744_Fogstar Drift.jpgScreenshot_20240118_064855_Fogstar Drift.jpgScreenshot_20240118_064908_Fogstar Drift.jpgScreenshot_20240118_064918_Fogstar Drift.jpgScreenshot_20240118_064932_Fogstar Drift.jpgScreenshot_20240118_064943_Fogstar Drift.jpgScreenshot_20240118_064955_Fogstar Drift.jpgScreenshot_20240118_065053_Fogstar Drift.jpgScreenshot_20240118_064121_Fogstar Drift.jpgScreenshot_20240118_064032_Fogstar Drift.jpg


...
 
For those that are wondering what the Fogstar BMS programming looks like.....

DO NOT TOUCH THE BMS PROGRAMING, ITS A SAFTEY FEATURE !!!! And invalidates the warranty.


(unless you really, really know what you're doing)

Didn't see a mention of the heater, so assuming it's a stand alone module.

...
View attachment 225920View attachment 225921View attachment 225922View attachment 225923View attachment 225924View attachment 225925View attachment 225926View attachment 225927View attachment 225928View attachment 225929View attachment 225930View attachment 225931View attachment 225932


...

Password protected in my app with the Drift 105
 
LOW TEMP charging. . .

playing with the Renogy dc-dc charger here --> Low temperature lithium battery

i added the temp sensor check the charge blocking feature of the charger .


-2.0c outside.

1705654407669.png

the renogy charger app showed -1.0c and charging blocked.

1705654439517.png

the Victron app agreed showing -1.0c at the battery terminal,

1705654485812.png


but the FS Drift showed slightly different. . . 0.3c ( the battery has 3x temp sensors)
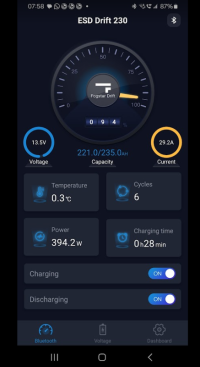
1705654520824.png


so a slight difference in temp readings. . . . .

i warmed up the Renogy charger temp sensor to allow charging,

and the FS happily started drawing 30A. . .

1705654617158.png

i wasnt so happy about this as it seemed that the internal heater had not kicked in yet - assuming it hadnt seen below 0c yet.

and the battery was taking full charge current so close to the 0c mark (0.3c)

there not mention od the heater in the BMS settings that i can see,

but there is the low temp cut off point (UTP) in the BMS settings . . . so i changed that from 0c to +2.0c (this will allow for the 2degc discrepancy i am seeing across the various temp sensors) - now im happy that the battery wont take full charge current below or near 0c.


1705654837064.png

that done the trick . . . .

the battery shut off the incoming charge and raised the UTC alarm (Under Temp Charge)

1705654977009.png

checking this at the Vic` shunt we 49W, around 4A still going into the battery.

even though the charge is OFF, . . . so im assuming this is the power for the Heater id its running?

50W / 4A seems about right?

the Renogy Smart heated needs 4A for the heater.

the Poweroad Heated needs 8A for its heater.
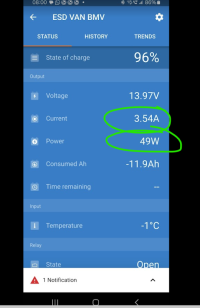
1705655124541.png


above 0.5c the UTC battery flag cleared. . . and the charger toggle flipped to ON again.

i thought the reset value was 5c? . . . but ill have to recheck that?


looking back the previous screenshots , , ,

we see:

UTP - 0.0c
UTP release - 5.0c
delay - 5sec.

that implys to me that the flag is triggered below 0, and will keep the charge OFF until the temp rises above 5.0c for 5seconds?

so not so sure, will need more testing.?

1705655353113.png


.

looks like i need colder temps to really see the Heater in action.
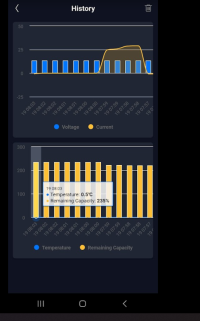

1705655540184.png

.
 
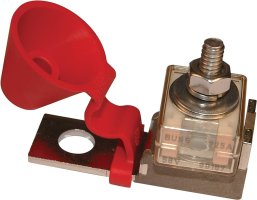
Don't suppose anyone has used one of the terminal fuse blocks on a Fogstar 230Ah SB battery?

1000008184.jpg


Space is at a premium in my install and this would mean not having to find space for a megafuse holder (and reduce crimp connectors by 2x) but I've a feeling the height will be too much and it'll foul the seat mechanism.
 
these were to high and fouled the seat swivel in mine . . .

BUT -- FWIW:

Renogy have started offering these now. . .

but i cant see them on the website.


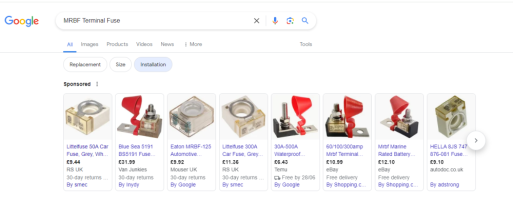
MRBF Terminal Fuse(30A/40A/60A/75A/100A/150A/200A/250A/300A/350A/400A)​


1717752457438.png1717752492198.png1717752479557.png


+++++++++


so why not copy Renogy,

and just use a longer bolt - then bolt through the cube fuse - without the extra holder bit?


1717752632298.png


.
 
Cheers, yeah I was just thinking that myself - definitely an option! :thumbsup:
Just looking at these fuses, you need an isolation nut/washer for them to work correctly - so that the ring terminal only contacts the ring on the fuse, not the stud or else that works bypass the fuse. These pics demonstrate it well:

1000008185.png
1000008186.png
 
Don't suppose anyone has used one of the terminal fuse blocks on a Fogstar 230Ah SB battery?

View attachment 244826


Space is at a premium in my install and this would mean not having to find space for a megafuse holder (and reduce crimp connectors by 2x) but I've a feeling the height will be too much and it'll foul the seat mechanism.
Is there space to mount it upside down hanging over the side of the battery?
 
Is there space to mount it upside down hanging over the side of the battery?
Yeah that might be an option too, but no idea if there's enough space.

I'll experiment with options and report back.

*Taps fingers waiting for battery delivery email...
 
Back
Top